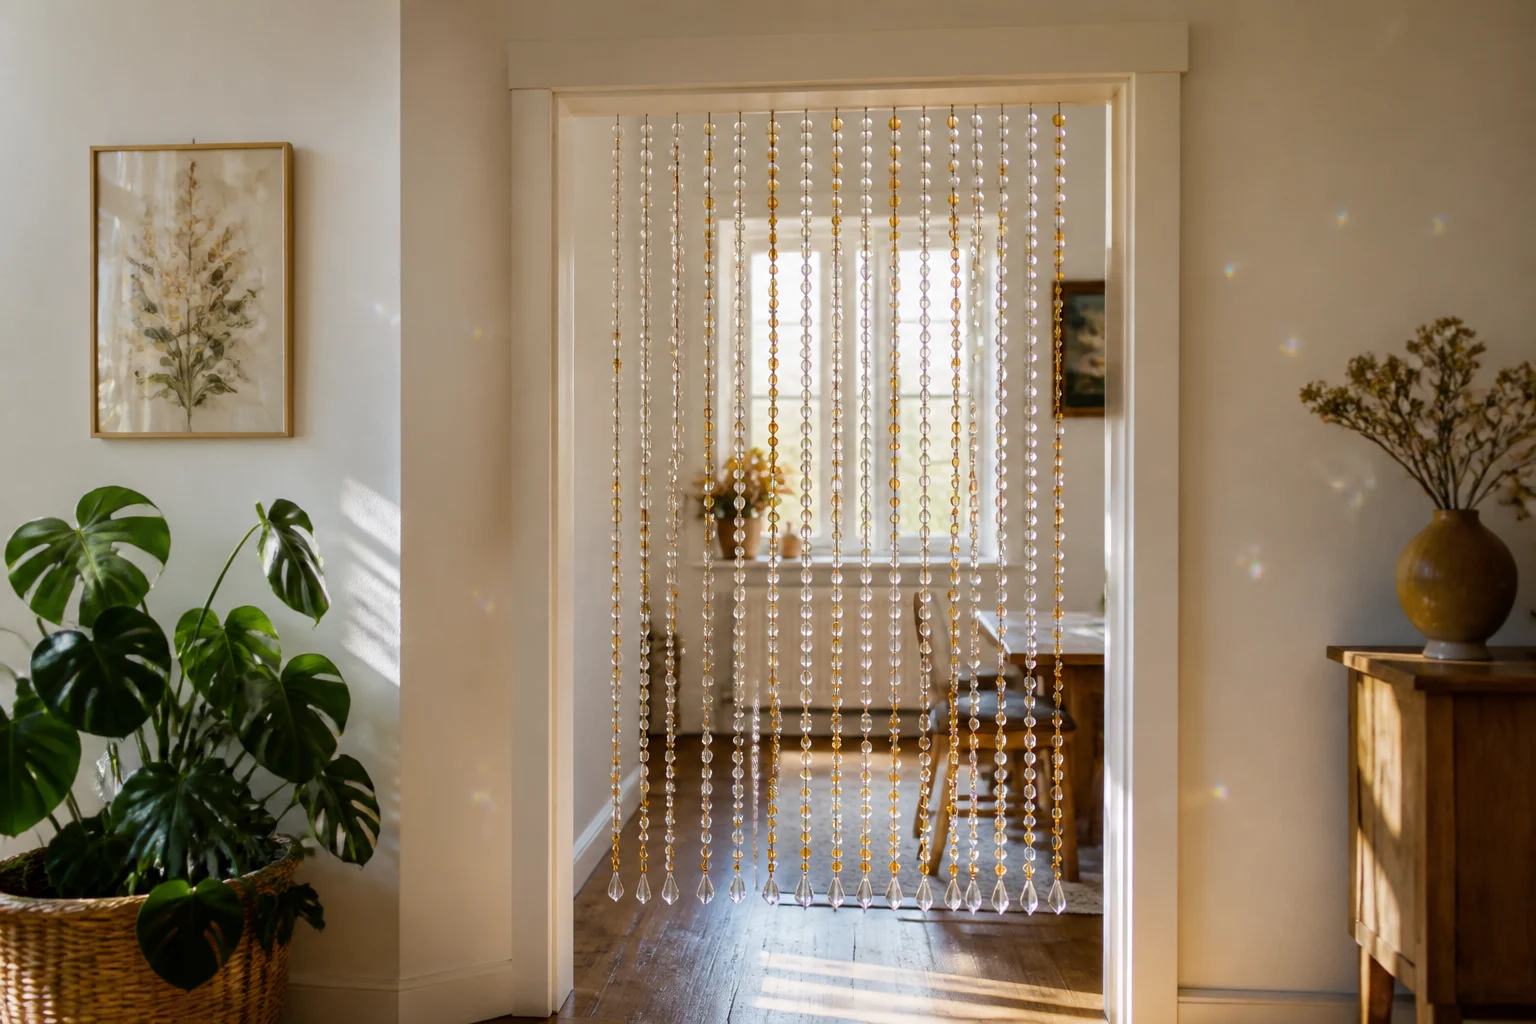
You want that soft, sparkling doorway moment, but the cheap bead curtains online either look flimsy, plastic, or nothing like the picture. A DIY glass bead curtain solves that problem, but only if you build it with enough structure to hang straight, move cleanly, and not turn into a tangled mess the first week.
I’ve made these for doorways, windows, closet openings, craft rooms, and one stubborn kitchen pass-through that caught afternoon sun perfectly. The difference between “pretty for one day” and “still hanging beautifully months later” comes down to the boring little choices: bead weight, spacing, cord type, and how you finish every strand.
What Is a Glass Bead Curtain?
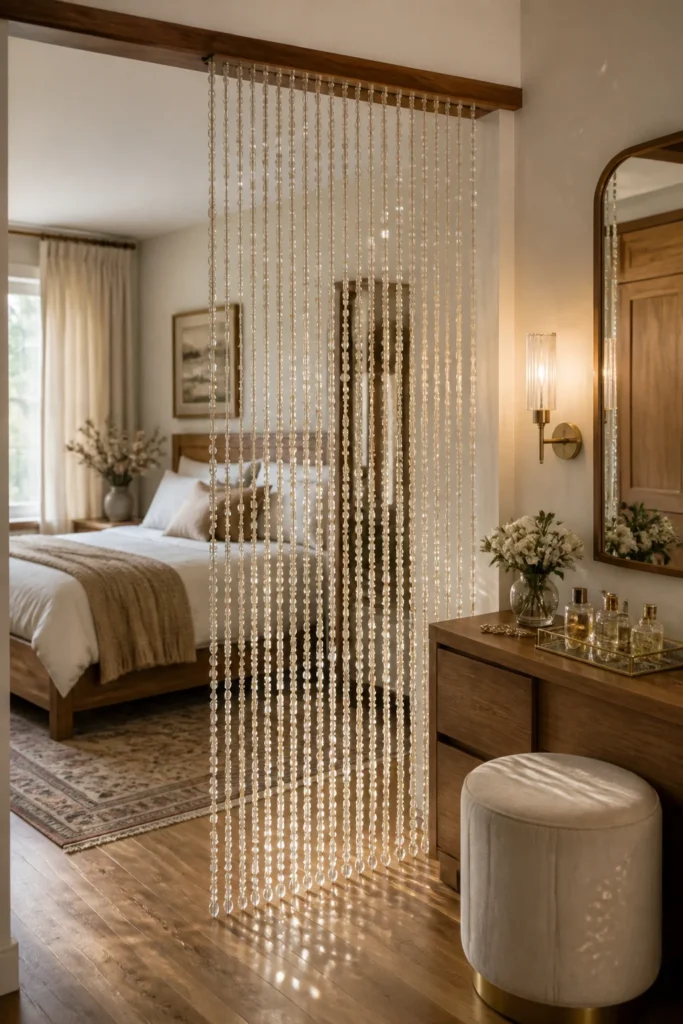
A glass bead curtain is a decorative hanging made from vertical strands of glass beads attached to a rod, rail, or wooden header. It can hang in a doorway, across a window, in front of open shelving, or as a room divider.
Unlike fabric curtains, bead curtains do not block a space completely. They soften it. They catch light, add movement, and create separation without making the room feel closed off.
A glass bead curtain DIY project gives you control over:
- The color palette
- The length
- The spacing between strands
- The glass bead curtain pattern
- The amount of shimmer or privacy
- The overall weight and movement
The important part is remembering that glass is heavier than acrylic or wooden beads. That weight makes the curtain look better, but it also means your hanging method needs to be stronger.
Where a DIY Glass Bead Curtain Works Best
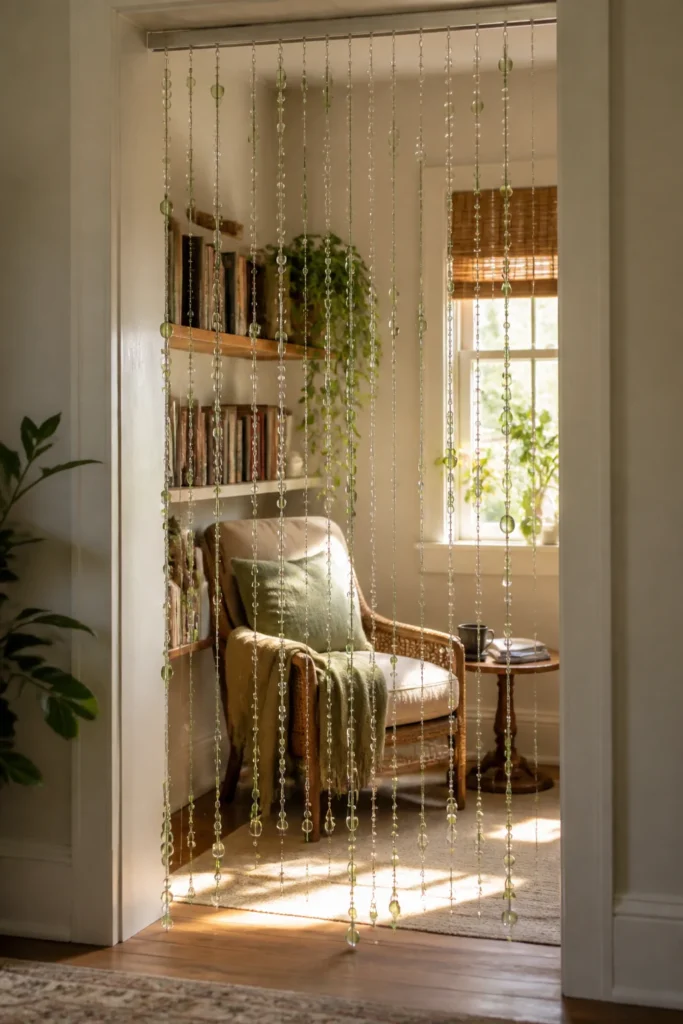
Not every spot in the house deserves glass beads. I learned that after hanging one too close to a back door where people rushed through with bags, elbows, and wet umbrellas.
Glass bead curtains work best in places where people pass gently or where the curtain mostly decorates rather than takes abuse.
Good places include:
- Bedroom doorways
- Closet openings
- Reading nooks
- Window alcoves
- Dressing areas
- Home studios
- Hallway transitions
- Open shelving fronts
- Decorative room dividers
Avoid hanging one where toddlers pull, pets jump, or people walk through with full laundry baskets every day. Glass beads can handle normal movement, but they are not made for rough traffic.
For a doorway you use constantly, leave slightly wider gaps between strands so the curtain parts easily instead of grabbing sleeves.
Materials You’ll Need
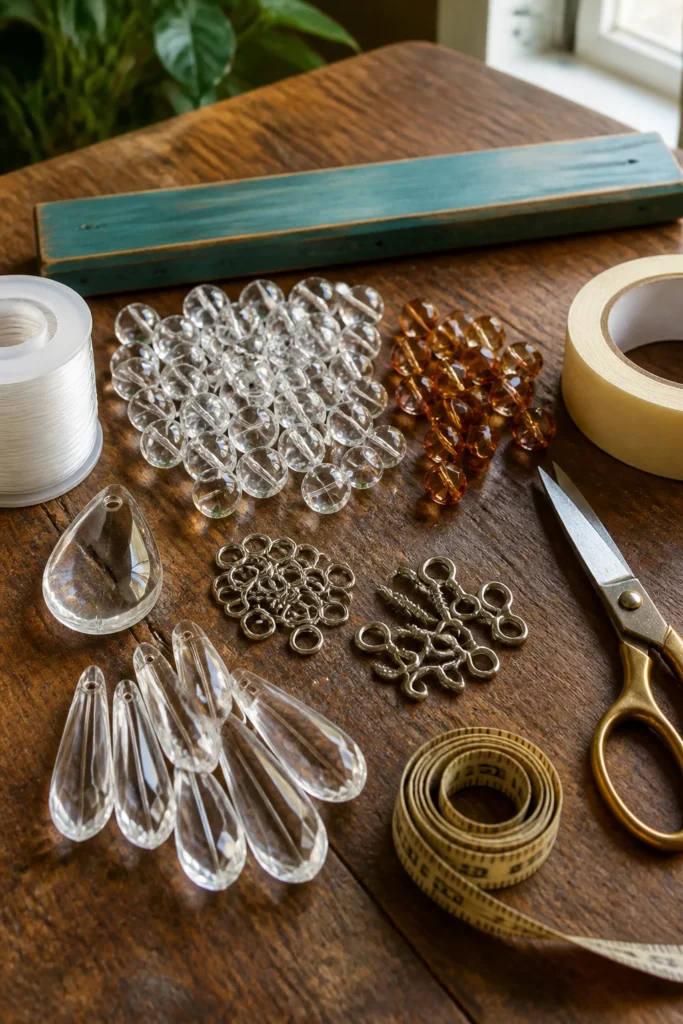
Here is the supply list I rely on for a sturdy glass bead curtain diy project. You can adjust the bead style, but do not compromise too much on the cord or hanging support.
| Material | Best Choice | Why It Matters |
|---|---|---|
| Glass beads | 6 mm to 12 mm beads | Big enough to show, not too heavy |
| Cord or wire | Nylon cord, beading wire, or fishing line | Holds weight without stretching too much |
| Crimp beads or knots | Crimps for wire, strong knots for cord | Secures each strand |
| Wooden dowel, curtain rod, or rail | Strong enough for the full weight | Prevents sagging |
| Jump rings or screw eyes | Metal, not plastic | Handles repeated movement |
| Measuring tape | Flexible tape is easiest | Helps keep strands even |
| Scissors or wire cutters | Depends on cord type | Gives clean strand ends |
| Masking tape | Optional but useful | Holds strand order while working |
| Small bowls or trays | For sorting beads | Saves time and frustration |
For most home projects, I prefer nylon cord over clear fishing line. Fishing line looks invisible at first, but it can kink and hold bends. Nylon cord feels more forgiving while you work and hangs with a softer drape.
Choosing the Right Glass Beads
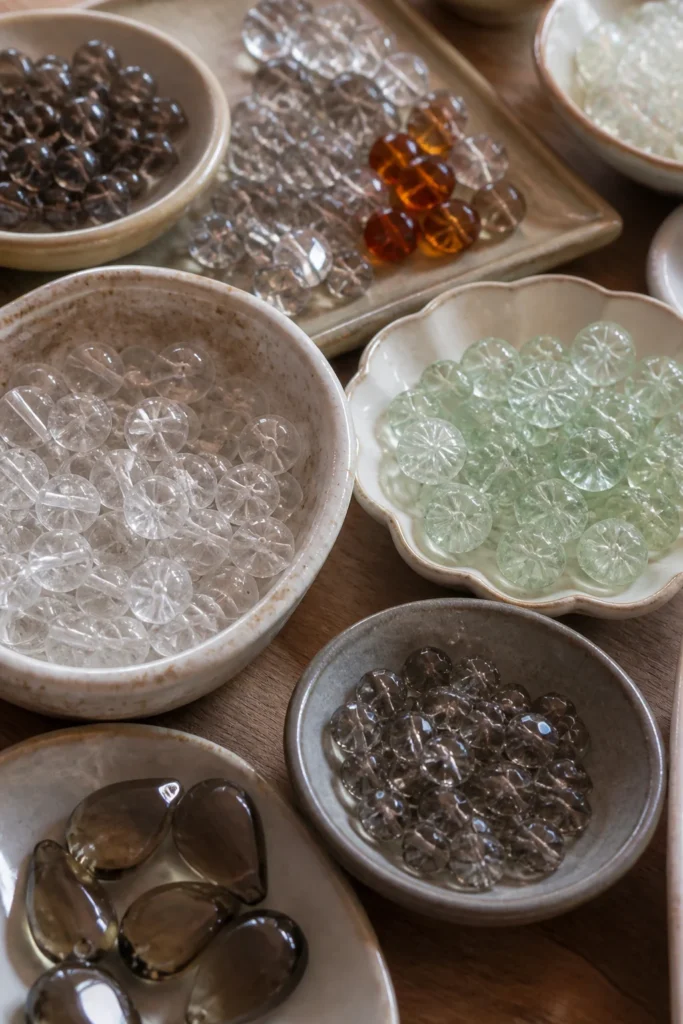
This is where the curtain gets its personality. I usually sort beads into three jobs: main beads, accent beads, and bottom-weight beads.
Main beads make up most of the curtain. These should be affordable, consistent in size, and easy to thread.
Accent beads add rhythm. These might be larger rounds, faceted beads, teardrops, or colored pieces placed at regular intervals.
Bottom-weight beads help each strand hang straight. A heavier bead or charm at the end keeps the curtain from curling or fluttering too much.
Good bead options include:
- Round glass beads for a classic curtain
- Faceted glass beads for more sparkle
- Seed beads for delicate patterns
- Crystal-style beads for a brighter look
- Pressed glass beads for vintage texture
- Teardrop beads for finished ends
For a first curtain, avoid mixing too many bead sizes. It looks tempting in the tray, but the finished curtain can feel busy. A simple base bead with one accent bead every few inches usually looks more intentional.
Measure Before You Buy Beads
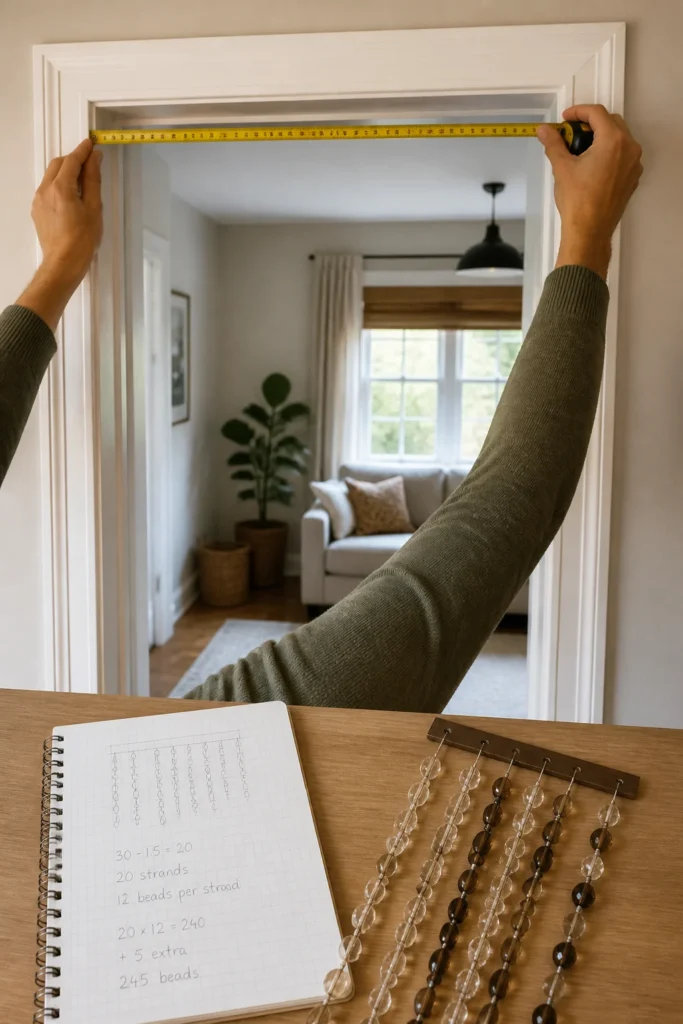
This step saves money. Glass beads add up quickly, and guessing usually means buying too many of one color and not enough of another.
Measure three things:
- Width of the opening
- Finished curtain length
- Spacing between strands
For a doorway, I like strands spaced about 1 inch apart for a fuller look or 1.5 inches apart for easier movement.
Here is a simple estimate:
- A 30-inch doorway with 1-inch spacing needs about 30 strands
- A 36-inch doorway with 1-inch spacing needs about 36 strands
- A 36-inch doorway with 1.5-inch spacing needs about 24 strands
Now estimate beads per strand. If your curtain will hang 72 inches long and your beads average 8 mm wide, you may need around 225 beads per strand if you bead the full length tightly.
That is a lot of glass.
To reduce weight and cost, you can leave small cord gaps between bead groups. For example, bead 3 inches, leave 1 inch of visible cord, then repeat. This still reads as a bead curtain but uses fewer beads.
Pick a Glass Bead Curtain Pattern
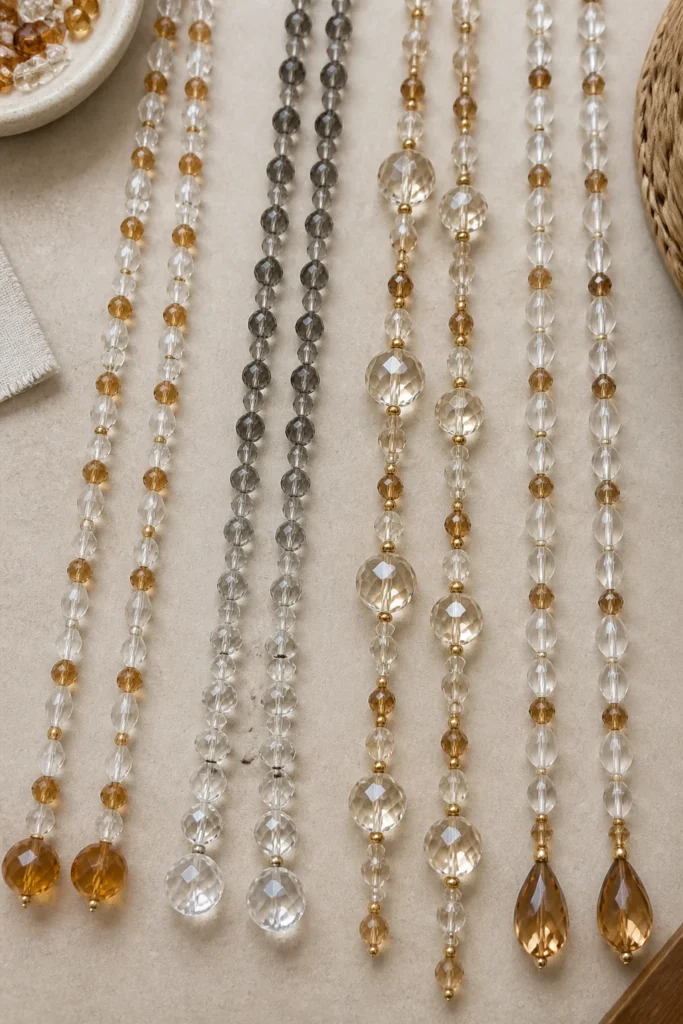
A good glass bead curtain pattern does not need to be complicated. In fact, the patterns that age best usually have one clear idea.
Here are a few patterns that work well at home.
1. Simple Repeating Pattern
Use the same sequence on every strand.
Example:
- 10 clear beads
- 1 amber bead
- 10 clear beads
- 1 amber bead
This gives the curtain rhythm without making it look too planned. It also makes mistakes easier to spot while you work.
2. Ombre Pattern
Start with darker beads at the top and fade to lighter beads near the bottom.
This works beautifully in windows because the lower beads catch more direct light. Blue-to-clear, smoke-to-clear, and green-to-clear combinations look especially good without feeling loud.
3. Center Highlight Pattern
Keep most strands simple, then make the center strands more detailed.
This works well for doorways because the middle gets the most visual attention. You might use larger accent beads on the center 6 to 8 strands and keep the side strands lighter.
4. Random-But-Controlled Pattern
This is my favorite when using leftover beads.
The trick is to limit your colors to three or four. Then repeat one “anchor” bead at predictable intervals so the curtain does not look accidental.
For example, every strand can include a small clear bead every fifth bead, even if the other colors vary.
5. Bottom Accent Pattern
Keep the top two-thirds simple and add decorative beads only near the bottom.
This keeps the curtain from feeling heavy around eye level. It also lets you use special beads where they are easier to notice.
Plan the Layout Before Stringing
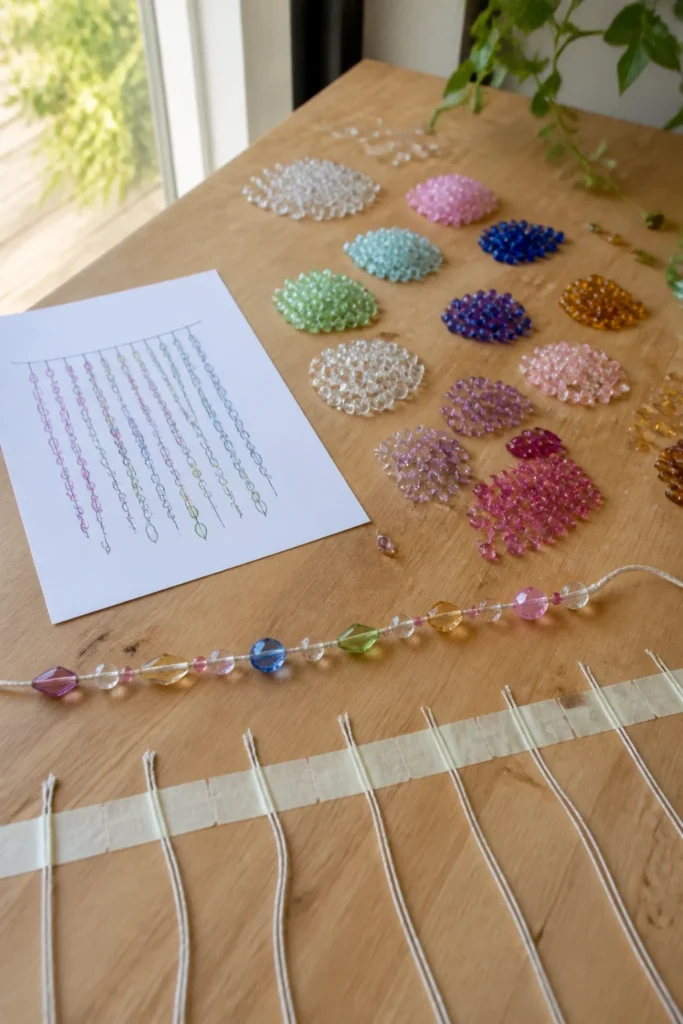
Do not start threading straight from the bag. That is how you end up halfway through strand 17 realizing your “random” pattern has made one side much darker than the other.
Lay your beads out first.
For a doorway curtain, I usually plan in one of these ways:
- By strand: Make small bead piles for each strand.
- By row: Arrange beads in rows if the pattern moves across the curtain.
- By color zone: Separate top, middle, and bottom beads for ombre designs.
If the pattern matters, tape a quick guide to your table. It does not need to look professional. A scrap of paper with “clear x 12, green x 1, clear x 12” is enough.
Take a photo of the layout before you begin stringing. If a bowl spills or you stop for the night, that photo saves the project.
Choose the Best Hanging Base
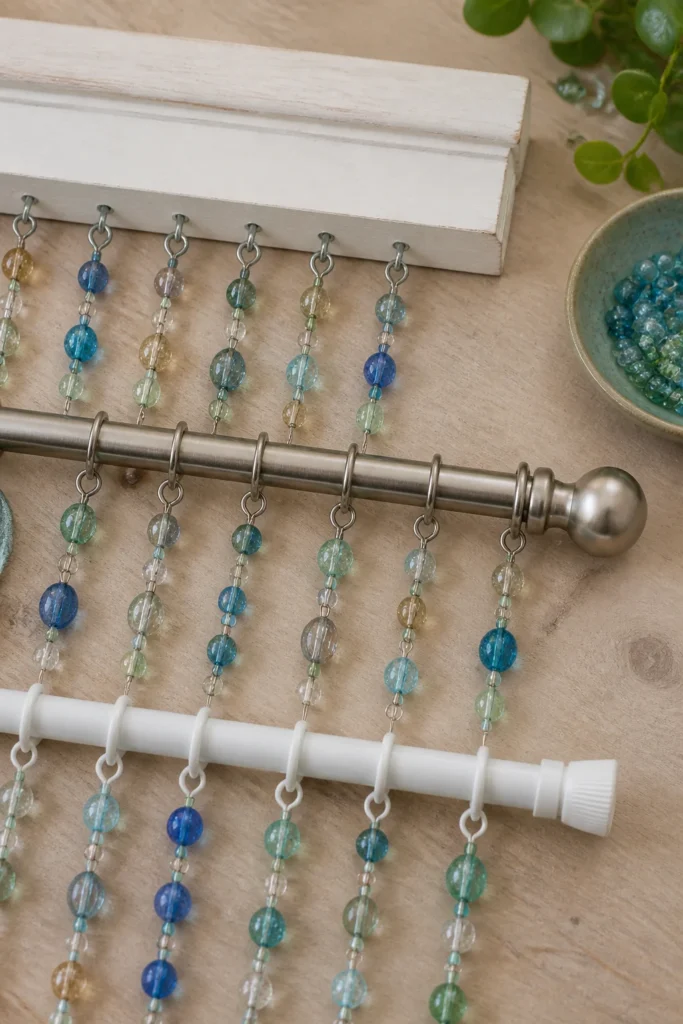
The hanging base carries all the weight, so pick it before you make the strands.
You have three solid options.
Wooden Header
A wooden header is a strip of wood mounted above the doorway or window. You add screw eyes or small hooks along the bottom edge, then attach each bead strand.
This is the strongest option for a heavy glass curtain.
Use it when:
- The curtain is wide
- The beads are large
- The curtain will stay up long-term
- You want exact strand spacing
A painted or stained wood strip also gives the project a finished look.
Curtain Rod
A curtain rod works if your strands are lighter and you attach them with rings.
This method makes the curtain removable. It also suits renters better because you may already have brackets installed.
Use metal rings or small S-hooks instead of tying strands directly around the rod. Direct knots can slide around and make the spacing uneven.
Tension Rod
A tension rod is the easiest option, but only use it for a small or lightweight curtain.
Glass beads can pull a weak tension rod down without warning. If you use one, test it with weight before adding every strand.
For a narrow window, a tension rod can work well. For a full doorway, I would choose wood or a mounted metal rod.
How to Make a DIY Glass Bead Curtain
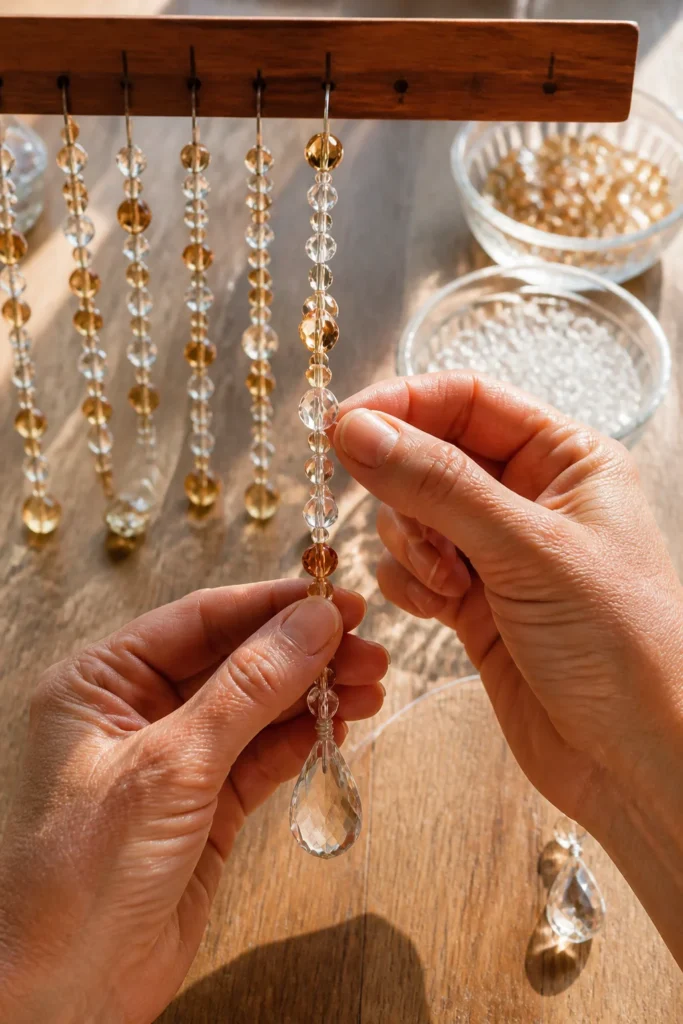
This is the method I use when I want a curtain that hangs cleanly and survives real use.
Step 1: Measure and Mark the Header
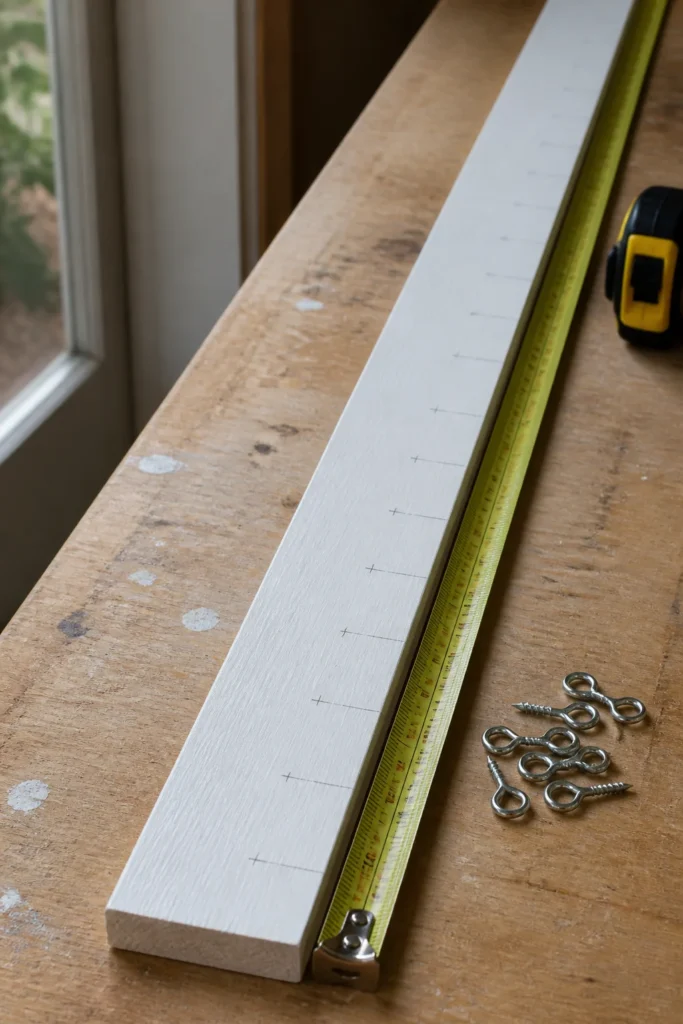
Measure the width of your opening. Cut or choose a rod/header that fits the space.
If you are using a wooden header, mark the strand positions with pencil.
For full coverage:
- Start ½ inch from the left edge.
- Mark every 1 inch across the wood.
- Stop ½ inch before the right edge.
For a looser curtain, mark every 1.5 inches instead.
Pre-marking keeps the curtain from looking crowded on one side and sparse on the other.
Step 2: Cut the Cord Longer Than Needed
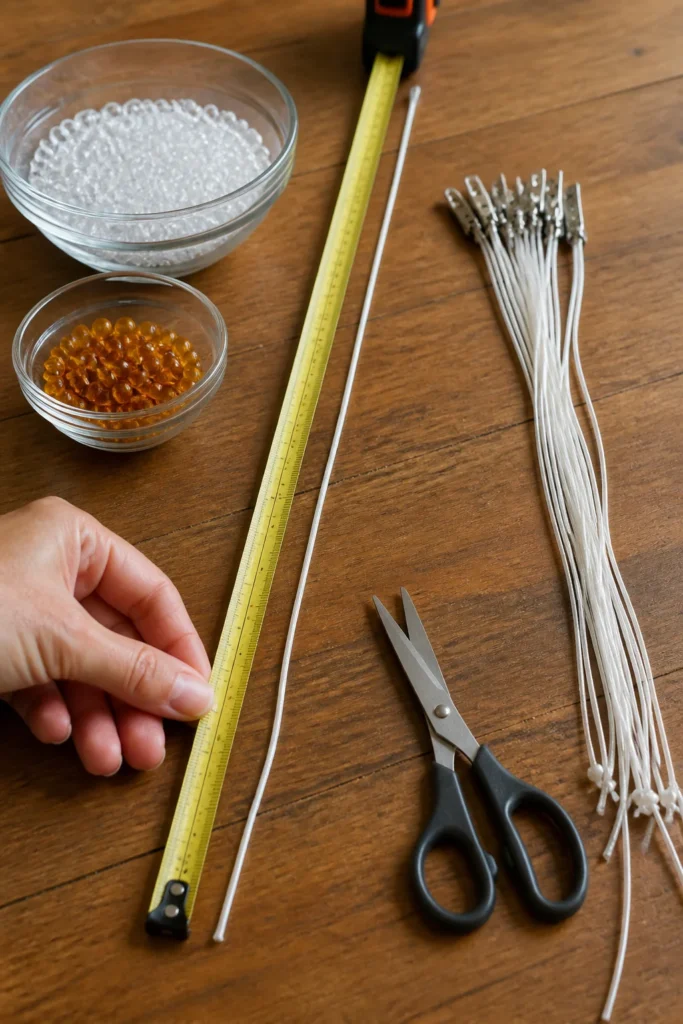
Cut each cord about 8 to 10 inches longer than the finished curtain length.
That extra length gives you room for knots, crimps, adjustments, and mistakes. Short cord is one of those problems you cannot fix neatly later.
For a 72-inch curtain, cut each strand around 80 to 82 inches.
Keep the cut strands together with a loose knot or clip so they do not slide off the table.
Step 3: Secure the Bottom Bead First
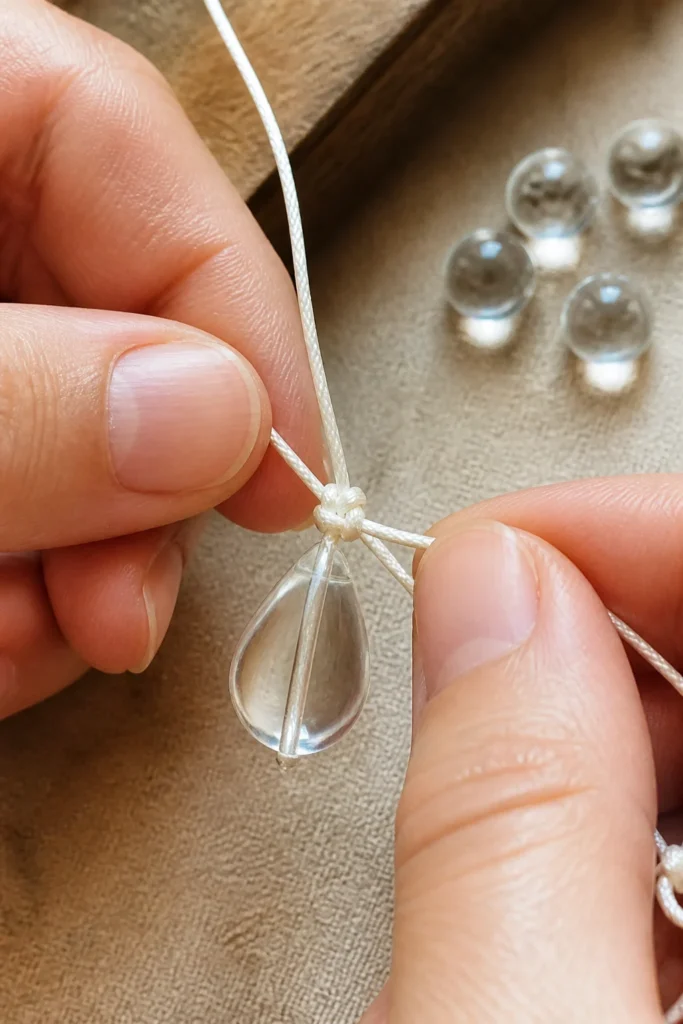
Start each strand from the bottom.
Tie on your bottom bead, charm, or larger glass bead first. If you are using nylon cord, make a strong double knot and add a tiny dab of clear craft glue if needed.
If you are using beading wire, use a crimp bead.
The bottom bead acts like a stopper and weight. It also gives every strand a finished end instead of a plain knot.
Step 4: String the Beads
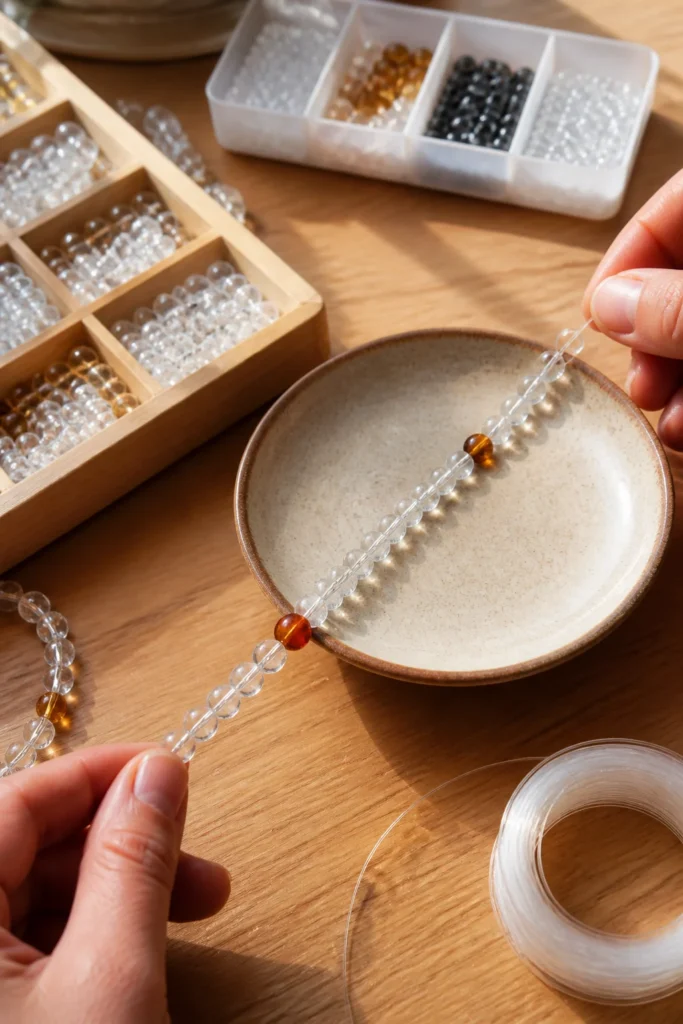
Thread beads according to your pattern.
Work one strand at a time, especially for your first curtain. It feels slower, but it prevents pattern drift.
A few practical habits help:
- Keep the active strand in a shallow bowl so beads do not roll away.
- Check the strand length every 12 inches.
- Hold the strand up occasionally to see how it hangs.
- Stop before the top 4 to 6 inches so you have room to attach it.
If you are making an ombre curtain, finish all strands in one color zone before opening the next bead color. That keeps the table from becoming a glittering mess with no system.
Step 5: Finish the Top of Each Strand
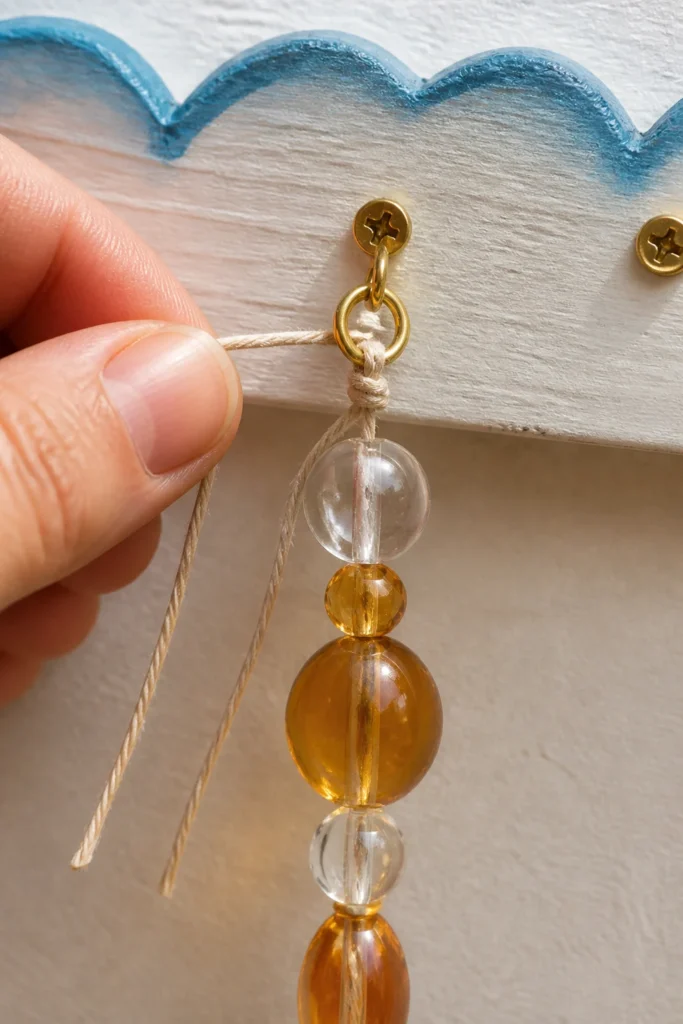
The top finish depends on your hanging base.
For screw eyes or hooks:
- Thread the cord through the screw eye or jump ring.
- Tie a tight double knot.
- Add a second knot if the cord feels slippery.
- Trim the tail only after the full curtain is hanging.
For curtain rings:
- Tie each strand to a small metal ring.
- Make sure every ring sits the same distance from the top bead.
- Slide the rings onto the rod in order.
Do not trim all the tails immediately. Hang first, adjust later, then trim. The curtain always reveals one or two uneven strands once gravity gets involved.
Step 6: Hang and Adjust the Curtain
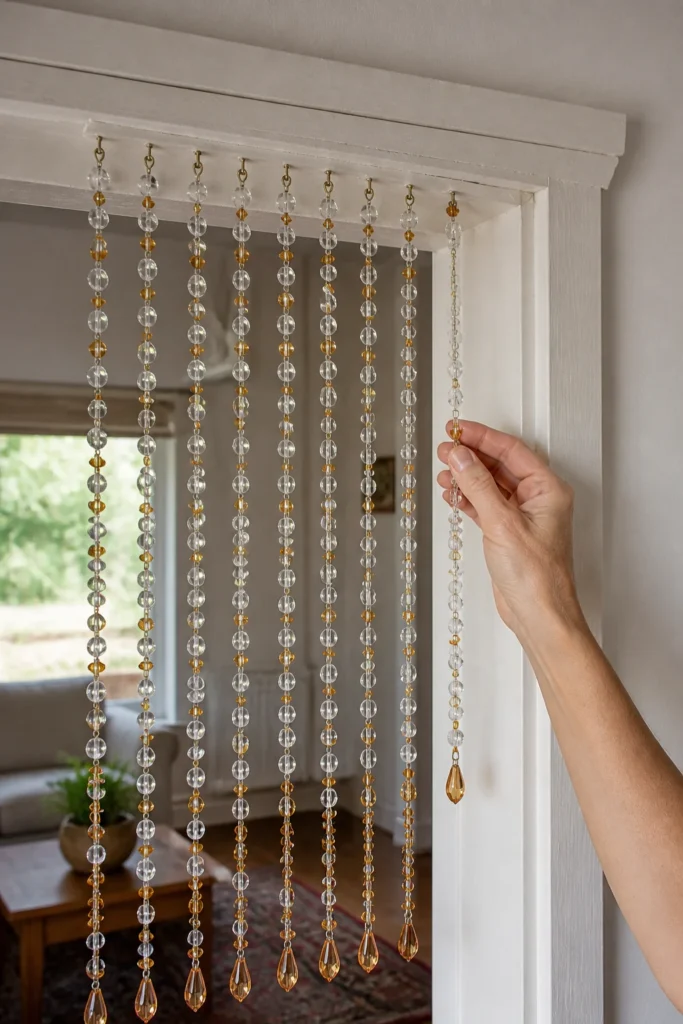
Mount the header or rod securely, then hang the strands.
Step back and look at the curtain from a few feet away. Do not judge it from six inches away while standing on a chair.
Check for:
- Uneven strand lengths
- Gaps that look too wide
- Heavy areas pulling forward
- Strands twisting around each other
- Pattern mistakes that catch the eye
If one strand hangs slightly longer, adjust the top knot before cutting the tail. If several strands look uneven, check whether your bottom beads are different sizes before blaming the cord.
Step 7: Trim and Secure the Ends
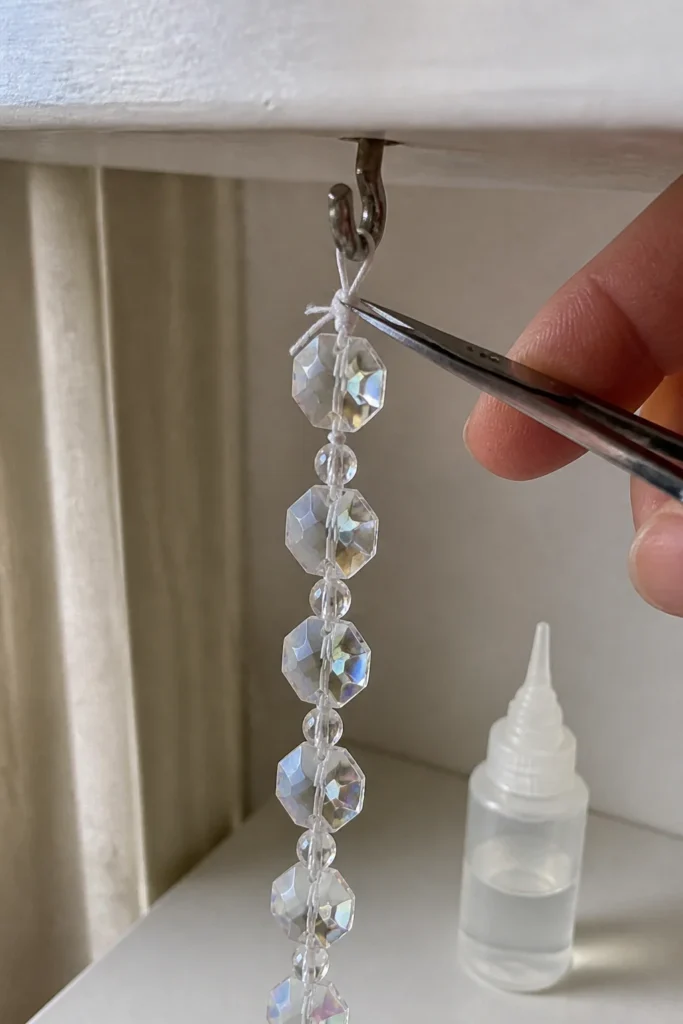
Once the curtain hangs evenly, trim loose cord tails.
Leave a tiny tail instead of cutting flush against the knot. A knot cut too close can loosen over time, especially if people walk through the curtain daily.
For nylon cord, a small dot of clear glue on the knot adds security. Use less than you think. Too much glue dries cloudy and stiff.
How Many Beads Do You Need?
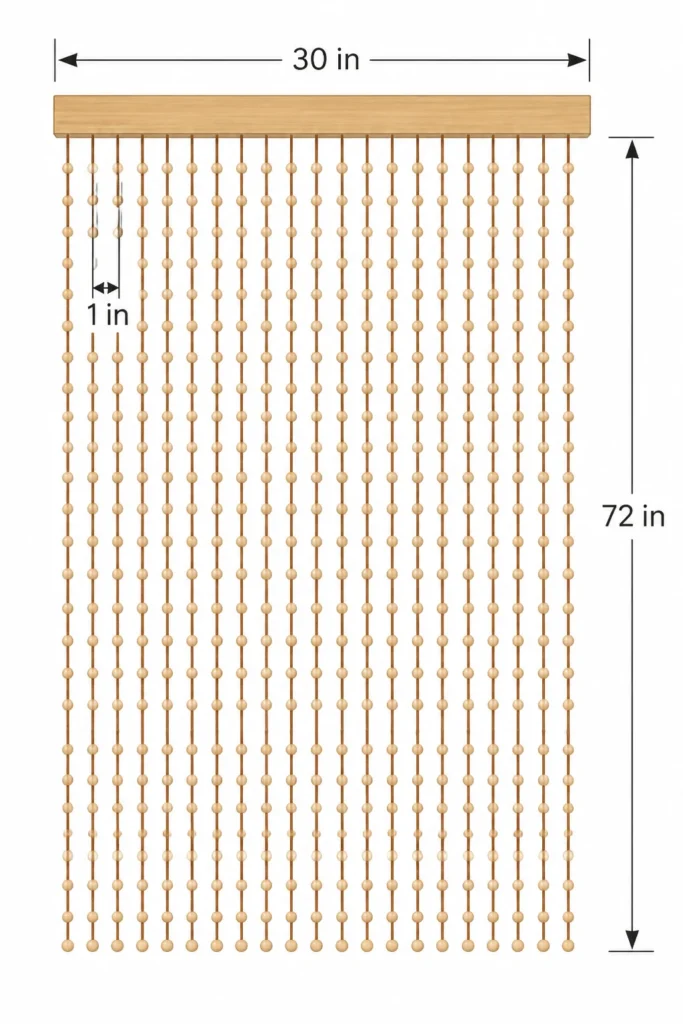
The exact number depends on bead size, strand length, and spacing, but this chart gives you a practical starting point.
| Curtain Size | Strand Spacing | Approx. Strands | Bead Style | Estimated Beads |
|---|---|---|---|---|
| 24 in wide x 60 in long | 1 in | 24 | Full bead strands | 4,000–4,800 |
| 30 in wide x 72 in long | 1 in | 30 | Full bead strands | 6,500–7,500 |
| 36 in wide x 72 in long | 1.5 in | 24 | Full bead strands | 5,200–6,000 |
| 36 in wide x 72 in long | 1 in | 36 | Bead-and-gap pattern | 5,000–6,500 |
| 18 in wide x 48 in long | 1 in | 18 | Window accent | 2,200–3,000 |
A full glass curtain can get heavy fast. If you want the look without the weight, use glass beads as accents and mix them with lighter clear acrylic beads. Just keep the glass beads at regular intervals so the finished piece still has that real-glass sparkle.
Tips for Making the Curtain Hang Straight
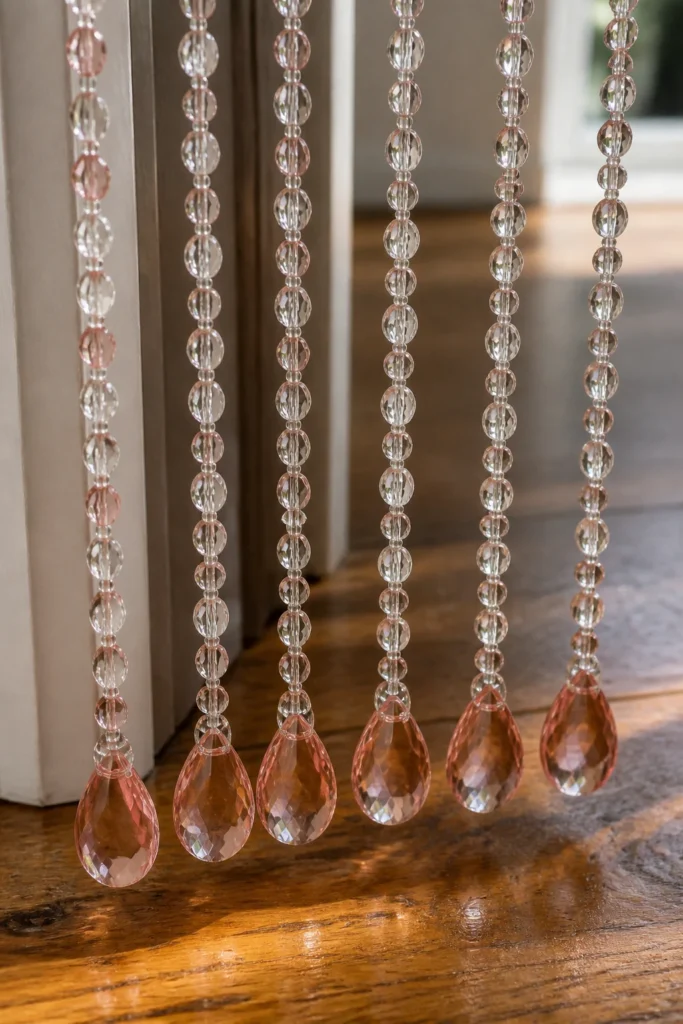
A bead curtain looks best when each strand drops cleanly. If the strands twist, bow, or tangle, the whole project starts to look messy no matter how pretty the beads are.
These small adjustments make a big difference:
- Use a heavier bead at the bottom of each strand.
- Keep bead sizes consistent within each strand.
- Avoid overloading one side with larger accents.
- Space strands evenly across the header.
- Let the curtain hang for a day before final trimming.
- Use cord that does not stretch under weight.
- Keep knots the same size at the top and bottom.
If a strand keeps twisting, remove it and let it dangle freely from your fingers. It will usually unwind itself. Then reattach it without spinning the cord.
Common Mistakes to Avoid
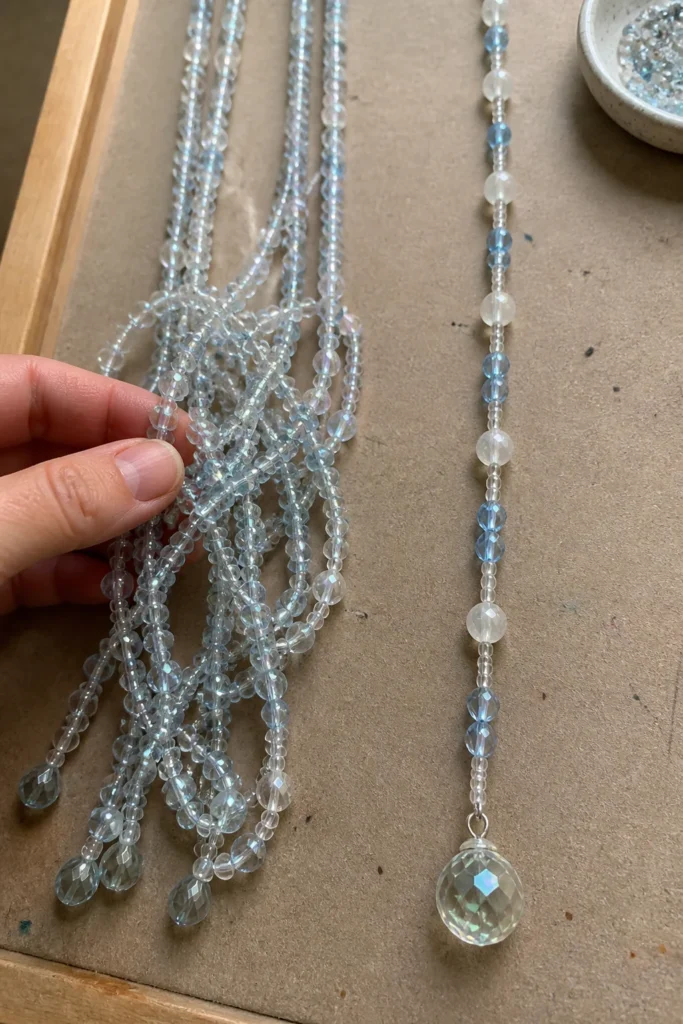
The first bead curtain I made looked good until I tried walking through it. The strands clung together because I had spaced them too closely and used tiny beads that behaved like a net.
Here are the mistakes worth avoiding:
- Using weak thread
Regular sewing thread is not enough for glass beads. It frays, stretches, and snaps under weight. - Skipping the bottom weight
Without a heavier end bead, strands move too much and tangle faster. - Making the curtain too dense
A very dense curtain looks beautiful in photos, but it can feel annoying in a doorway. - Ignoring total weight
A wide curtain made entirely from glass beads needs strong mounting hardware. - Cutting cord too short
Always leave extra length for knots and adjustments. - Using too many feature beads
Special beads stand out more when they have breathing room. - Not testing the pattern vertically
A pattern that looks nice flat on a table can feel crowded once it hangs.
How to Design a Glass Bead Curtain Pattern That Looks Intentional
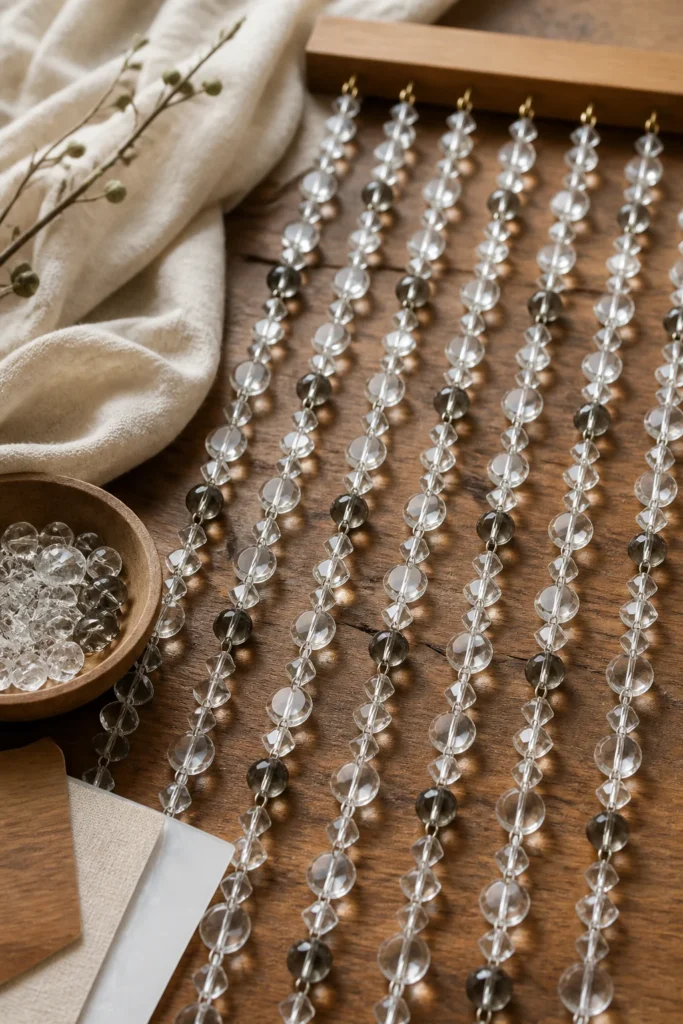
A glass bead curtain pattern should guide the eye without fighting the room. Before choosing colors, look at what already exists in the space.
If the room has warm wood, try amber, champagne, clear, smoke, or olive glass. If the room has white walls and cool light, clear, icy blue, pale green, and silver-lined beads work well.
For a calm pattern, choose:
- One main bead color
- One accent color
- One repeating shape
- One bottom bead style
For a more playful pattern, choose:
- Three related colors
- Mixed bead sizes
- A repeated accent every 4 to 6 inches
- Slight variation between strands
The safest rule is this: vary color or shape, not both equally. If the colors change often, keep the bead shape simple. If the shapes vary, keep the colors tighter.
Doorway vs. Window: What Changes?
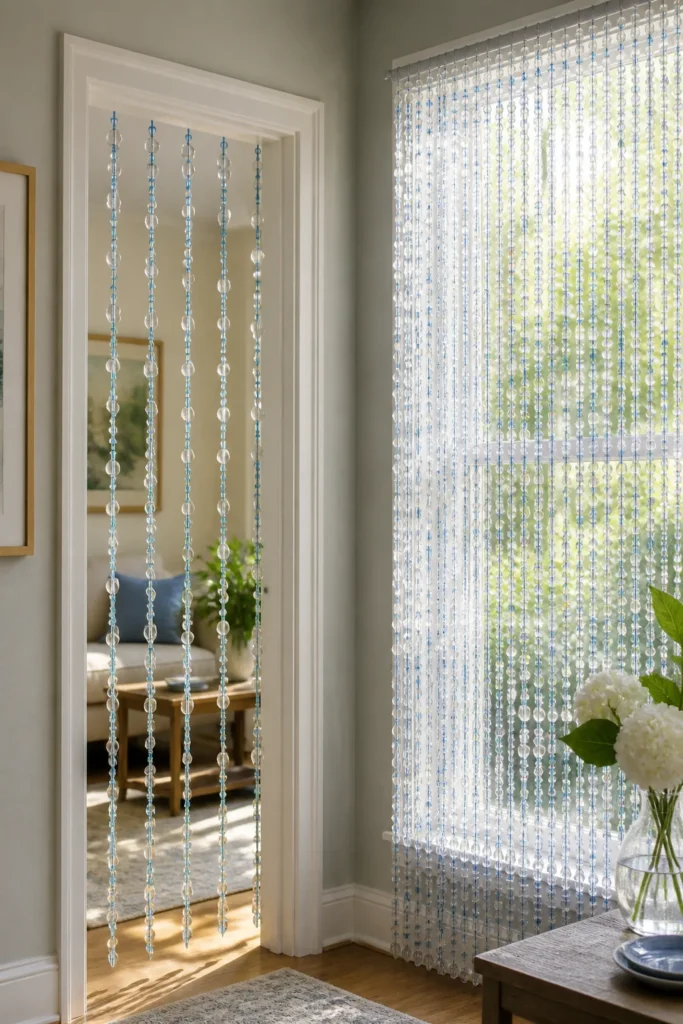
A doorway curtain needs movement. A window curtain needs light control and visual balance.
For a doorway glass bead curtain, use fewer strands or slightly wider spacing. People need to pass through without feeling like they are wrestling the curtain.
For a window glass bead curtain, you can place strands closer together because no one has to walk through it. Smaller beads also work better here because sunlight catches the details.
Doorway tips:
- Use 1 to 1.5 inch spacing.
- Add slightly heavier bottom beads.
- Avoid sharp-edged beads at shoulder height.
- Keep the center strands flexible.
Window tips:
- Use smaller faceted beads for sparkle.
- Try ombre or vertical stripes.
- Match the curtain length to the sill or frame.
- Use a slim rod to keep the look light.
A pattern that feels too delicate for a doorway may be perfect in a sunny window.
Can You Mix Glass Beads With Other Materials?
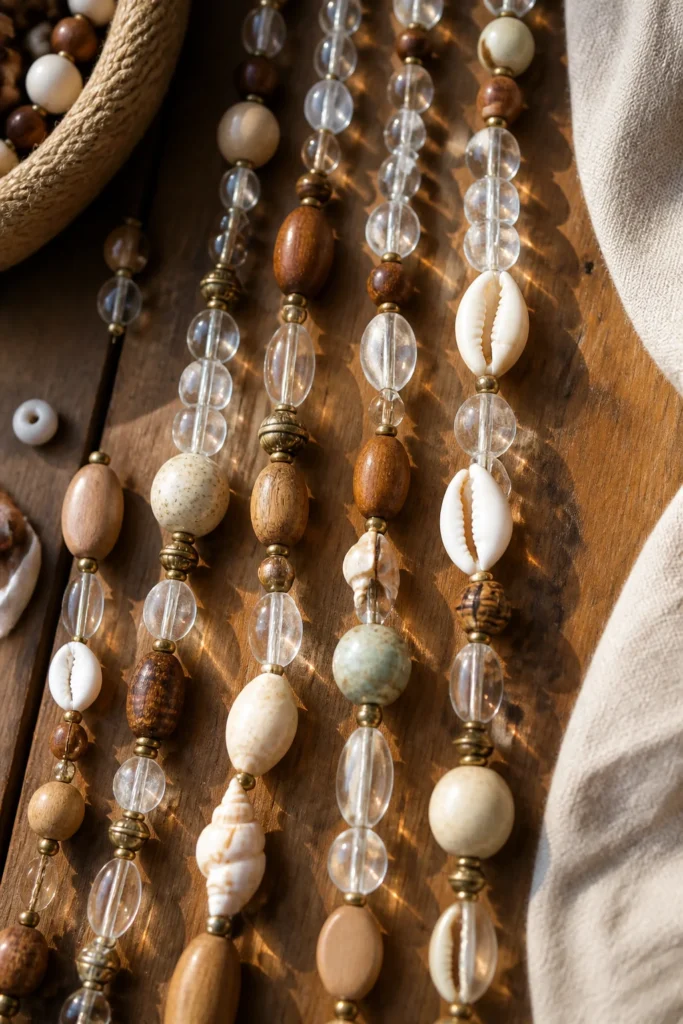
Yes, and sometimes you should. A curtain made from solid glass beads can become expensive and heavy, especially for a full doorway.
Good materials to mix with glass include:
- Wood beads for warmth
- Metal spacers for definition
- Acrylic beads for lighter sections
- Shell beads for a softer look
- Ceramic beads for a handmade feel
The key is weight balance. Do not put heavy glass beads on one strand and mostly lightweight beads on the next unless the difference is part of the design.
I like using glass where light matters most: near eye level, near the bottom, or in repeating accent bands. That gives the curtain sparkle without making the header carry unnecessary weight.
How to Mount a Heavy Glass Bead Curtain Safely
Glass bead curtains can weigh more than they look. A small window piece may be light, but a full doorway curtain can put real stress on the mount.
For a heavy curtain, use:
- Wall anchors if you are not drilling into studs
- A solid wood header
- Metal brackets
- Screw eyes instead of adhesive hooks
- A level before final tightening
Avoid stick-on hooks for anything made mostly of glass. They may hold for a while, then fail when humidity, heat, or daily movement weakens the adhesive.
If you rent, use a sturdy tension rod only for a narrow, lightweight curtain. Test it by hanging a bag with similar weight for a few hours before adding your finished strands.
Cleaning and Maintaining a Glass Bead Curtain
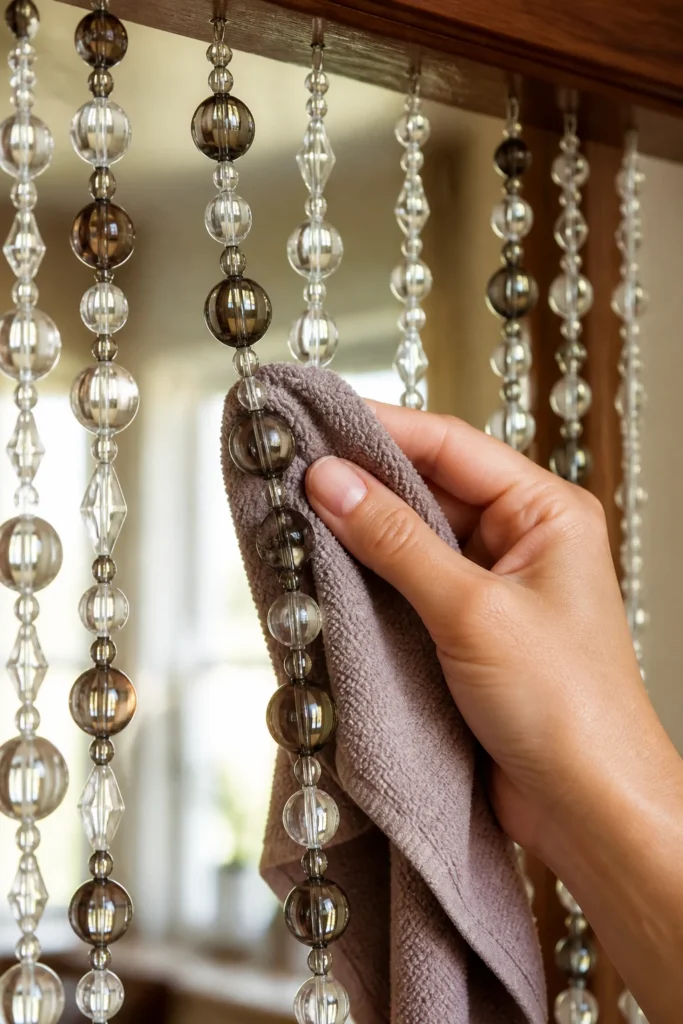
Dust will find the beads. It always does.
For regular cleaning, use a microfiber cloth and gently pinch each strand as you slide downward. Do not yank. The goal is to wipe the beads, not stretch the cord.
For deeper cleaning:
- Remove a few strands at a time.
- Place them on a towel.
- Wipe with a damp cloth and mild soap.
- Dry fully before rehanging.
- Check knots or crimps as you go.
Do not soak the entire curtain unless you know every bead, cord, and metal part can handle water. Some dyed beads, cheap metal spacers, and glued knots do not like long baths.
If one strand breaks, save the beads in a labeled bag or small jar. A broken strand is annoying, but it is easy to rebuild if you still have the pieces.
Budget-Friendly Ways to Make It Look Better
A DIY glass bead curtain does not have to use expensive crystal beads from top to bottom. Strategic placement matters more than price.
Try these upgrades:
- Use simple clear beads for most of the curtain.
- Spend more on the bottom beads.
- Add faceted beads only where light hits.
- Repeat one standout bead instead of buying many styles.
- Use a painted wooden header for a finished top edge.
- Make fewer strands but space them neatly.
- Add glass accents to a lighter bead base.
One of my favorite low-cost versions used mostly plain clear rounds with smoky gray beads every few inches. The pattern looked quiet indoors, then showed up beautifully when the afternoon light moved across it.
Troubleshooting: Fixes for Common Problems
Even a carefully made curtain may need small corrections once it hangs.
| Problem | Likely Cause | Fix |
|---|---|---|
| Strands tangle often | Spacing too tight or beads too small | Remove a few strands or add bottom weights |
| Curtain sags in the middle | Header or rod is too weak | Add center support or switch to wood |
| Strands look uneven | Cord stretched or knots vary | Let hang 24 hours, then adjust |
| Pattern looks chaotic | Too many colors or shapes | Simplify side strands or repeat one anchor bead |
| Curtain feels too heavy | Too many full glass strands | Replace some sections with lighter beads |
| Knots slip | Cord is slick | Double knot and add clear glue |
| Beads chip near the floor | Curtain hangs too low | Raise the header or shorten strands |
Most problems show up in the first two days. That is why I do not fully trim or glue every top knot until the curtain has had time to settle.
Safety Notes for Glass Bead Curtains
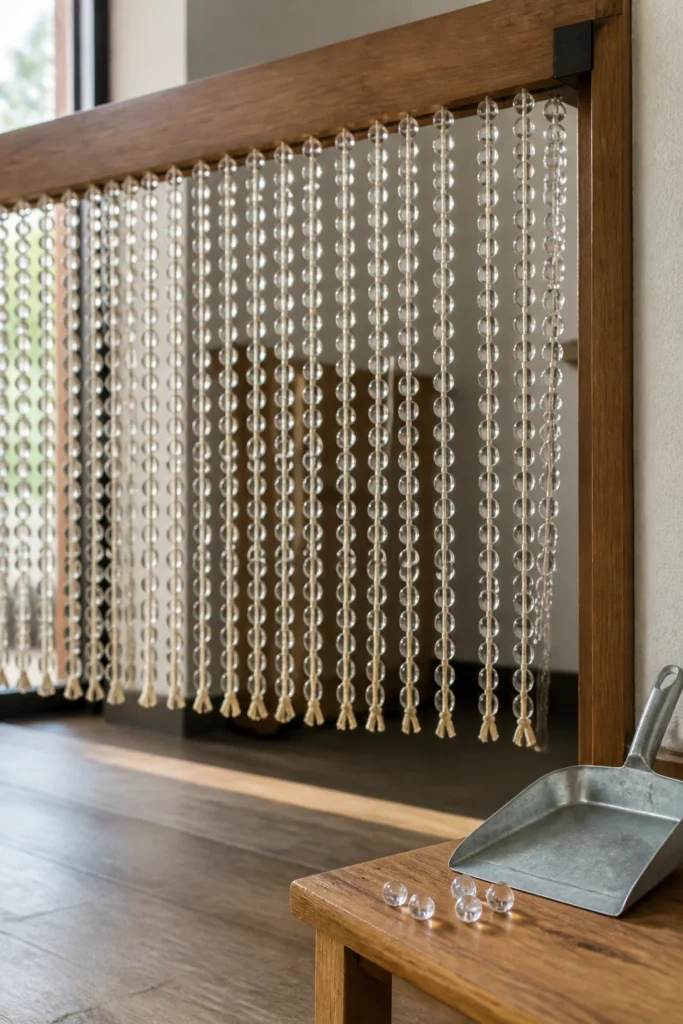
Glass beads are beautiful, but they are still glass. Treat the finished curtain like decor, not a toy.
Keep these points in mind:
- Do not hang glass bead curtains where small children can pull them.
- Avoid placing them near crib areas, play corners, or pet climbing spots.
- Sweep immediately if a bead breaks.
- Use smooth beads in high-contact areas.
- Check the mounting hardware every few months.
- Do not hang a heavy curtain from weak trim.
If you love the look but need something safer for a busy family space, use acrylic beads for the main curtain and save glass beads for a high window accent.
Simple Beginner Pattern to Try
This pattern works well for a first project because it is easy to repeat and hard to mess up.
Use:
- Clear 8 mm glass beads
- One accent color, such as amber or pale blue
- One larger bottom bead per strand
- Nylon cord
- A wooden header
Pattern per strand:
- Tie on the bottom bead.
- Add 12 clear beads.
- Add 1 accent bead.
- Add 12 clear beads.
- Repeat until the strand reaches the right length.
- Leave 4 to 6 inches of cord at the top for tying.
For a 30-inch doorway, make around 30 strands. For a lighter look, make 22 to 24 strands and space them slightly wider.
A More Detailed Pattern for a Window
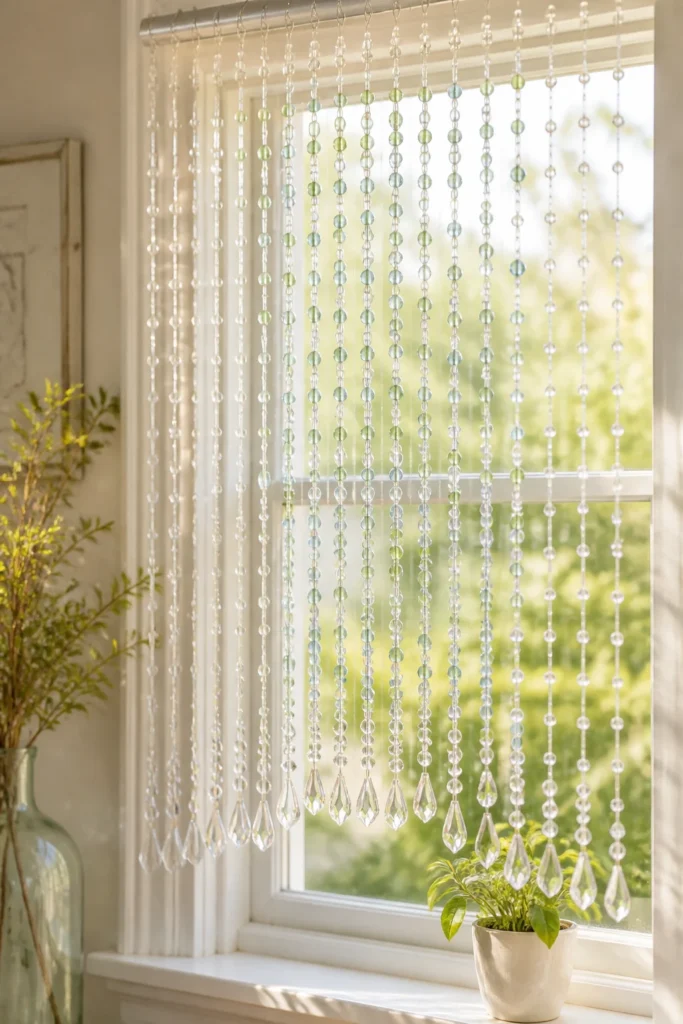
For a window, you can use a little more detail because the curtain will not be brushed aside all day.
Try this soft vertical pattern:
- Side strands: mostly clear beads
- Middle strands: clear beads mixed with pale green or blue
- Bottom 8 inches: add more faceted beads
- Final bead: teardrop or larger round bead
This creates a subtle center glow without making the whole curtain look striped. It works especially well on an east- or west-facing window where the light changes during the day.
Final Checklist Before You Start
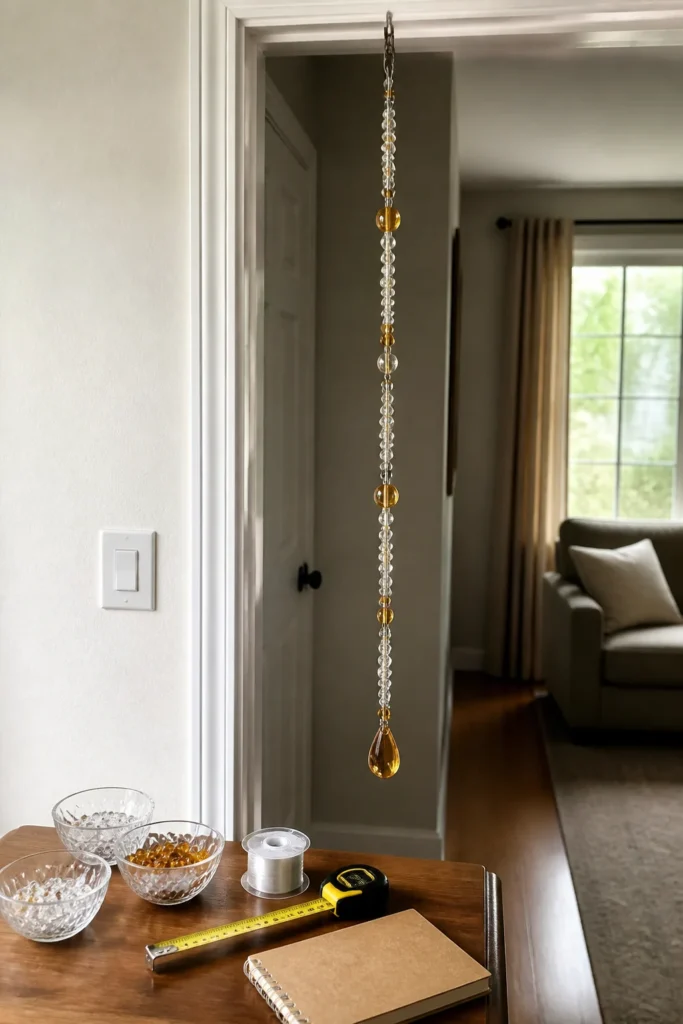
Before cutting cord or opening every bead packet, check these basics:
- You know the exact width and length.
- You chose strand spacing.
- Your hanging base can hold the weight.
- You tested the pattern on one strand.
- You bought extra cord.
- You have a plan for bottom weights.
- You have enough beads to finish all strands.
- You know whether the curtain is decorative or used daily.
Make one complete test strand first. Hang it in the actual spot, step back, and look at it in the room’s real light. That one strand will tell you more than a full tray of beads on the table.
Conclusion
A glass bead curtain is not just a craft project; it is a small lesson in weight, light, patience, and repetition.
Once you understand how the strands behave, the whole process becomes easier: measure carefully, keep the pattern simple, secure the ends well, and let the beads do what glass does best.
Start with one strand, then another. Before long, you will hear that soft click of beads moving in the doorway, and the project will feel less like something you made and more like something the room was waiting for.