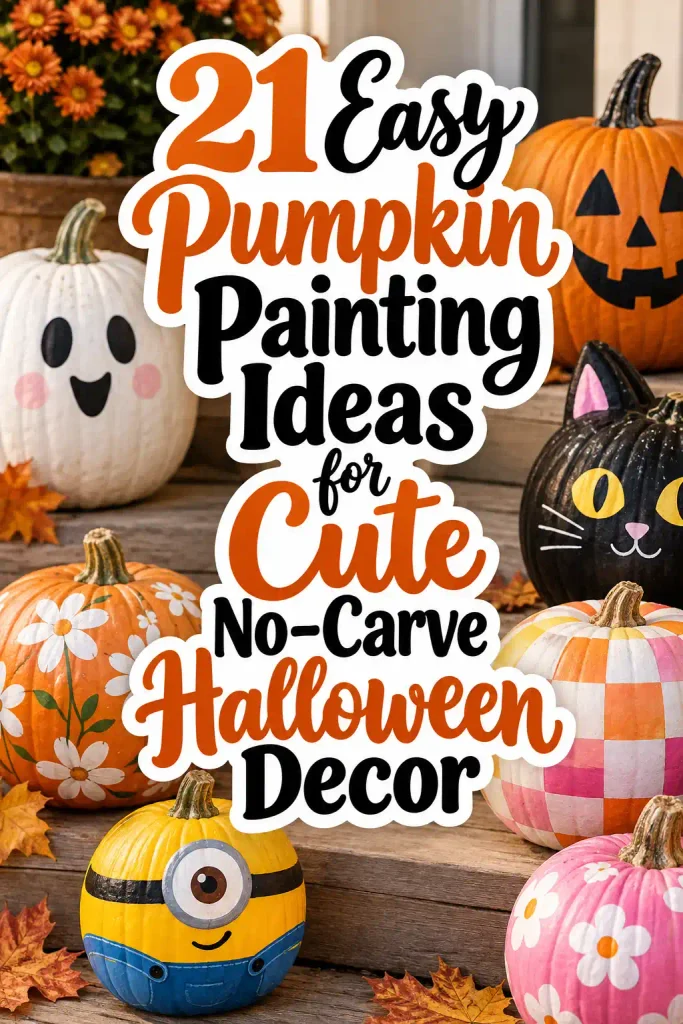
Pumpkin carving is a Halloween tradition, but it isn’t the only way to decorate pumpkins. A few colors of paint can turn an ordinary pumpkin into a cute ghost, a tiny work of art, or a playful character without cutting into the shell or dealing with pumpkin seeds.
The most interesting pumpkin painting ideas go beyond the usual jack-o’-lantern face. Think tiny flowers on a cream pumpkin, a wide-eyed Frankenstein, black-and-white doodles, or a collection of colorful characters arranged on the front porch.
These 21 designs range from simple patterns that take little artistic skill to more detailed projects worth displaying indoors. Choose one that suits your decorating style, then adjust the colors and details to make it your own.
1. Cute Ghost Pumpkin
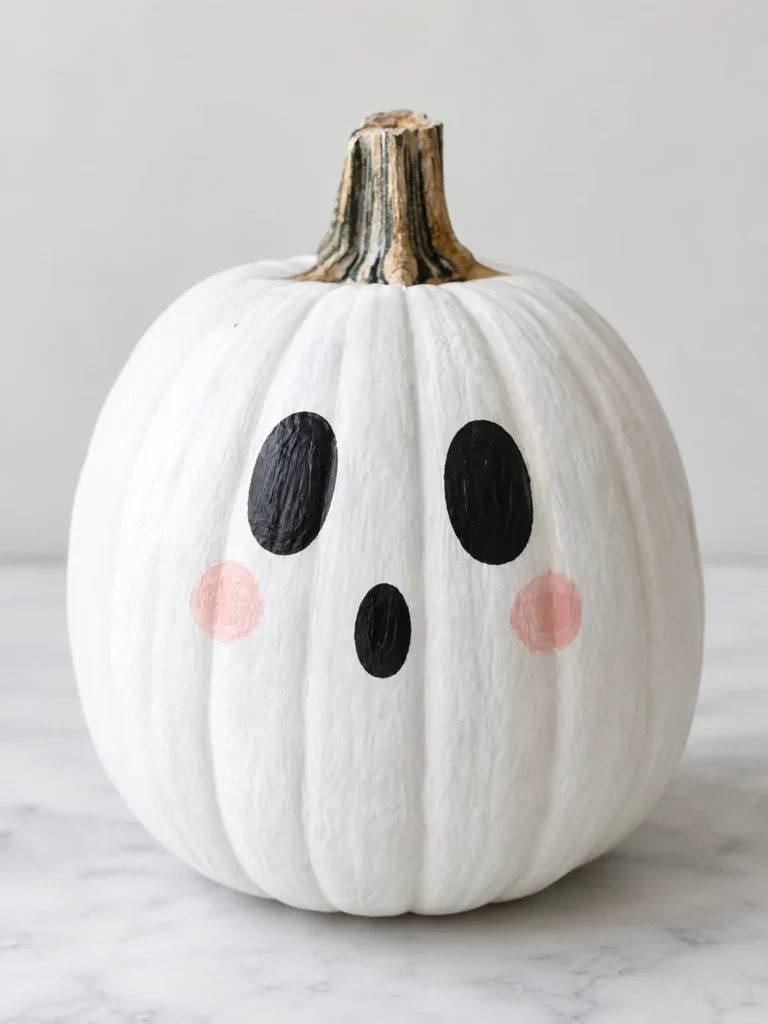
Paint two black oval eyes and a small mouth near the center. A tiny pink blush on each cheek makes the expression softer, while an uneven mouth gives the ghost a surprised look.
For a collection, paint three pumpkins with different expressions: one smiling, one looking sleepy, and one looking startled. Display them together on a mantel or entryway table.
Best for: Cute Halloween displays and beginner painters.
2. Classic Smiling Jack-o’-Lantern
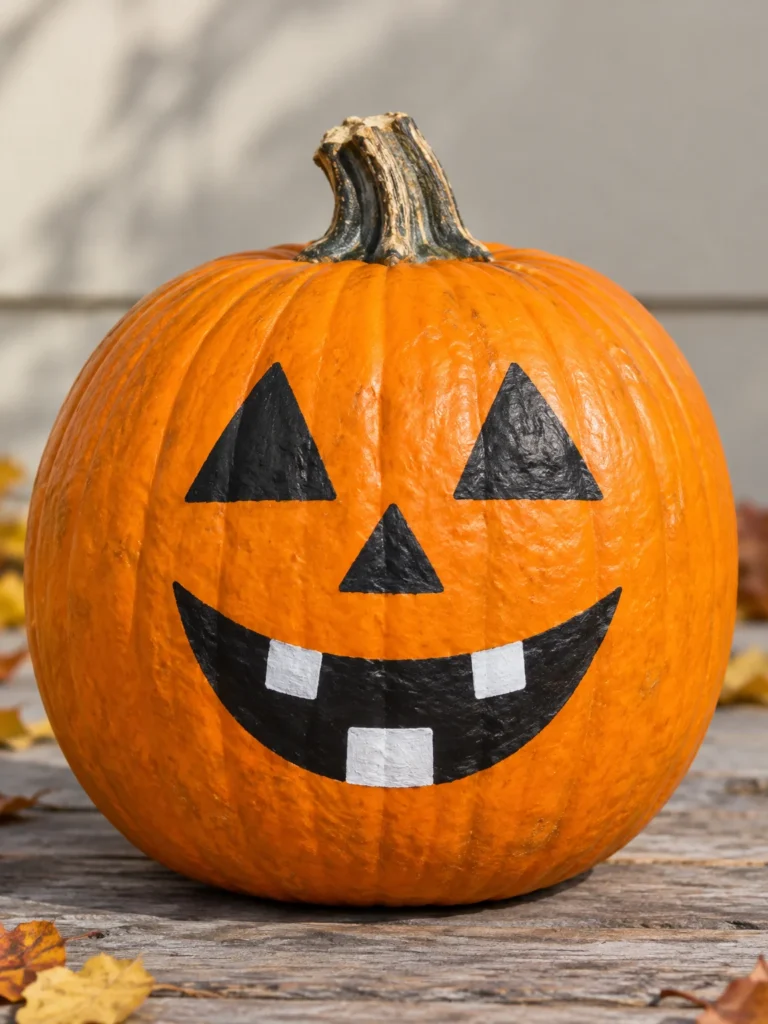
You can recreate the familiar jack-o’-lantern face without carving a single opening. Keep the pumpkin orange and use black paint to draw two triangular eyes, a small nose, and a wide smile.
The mouth is where you can have fun with the design. Paint a simple curved line for a friendly expression, or add uneven white teeth for a mischievous grin. You could even give each pumpkin a different personality.
A small brush works well for larger facial features, while a fine-tip paint pen helps create neat outlines. Let the black paint dry before adding any white details.
Best for: Traditional Halloween decorating without carving tools.
3. Floral Pumpkin With Daisies
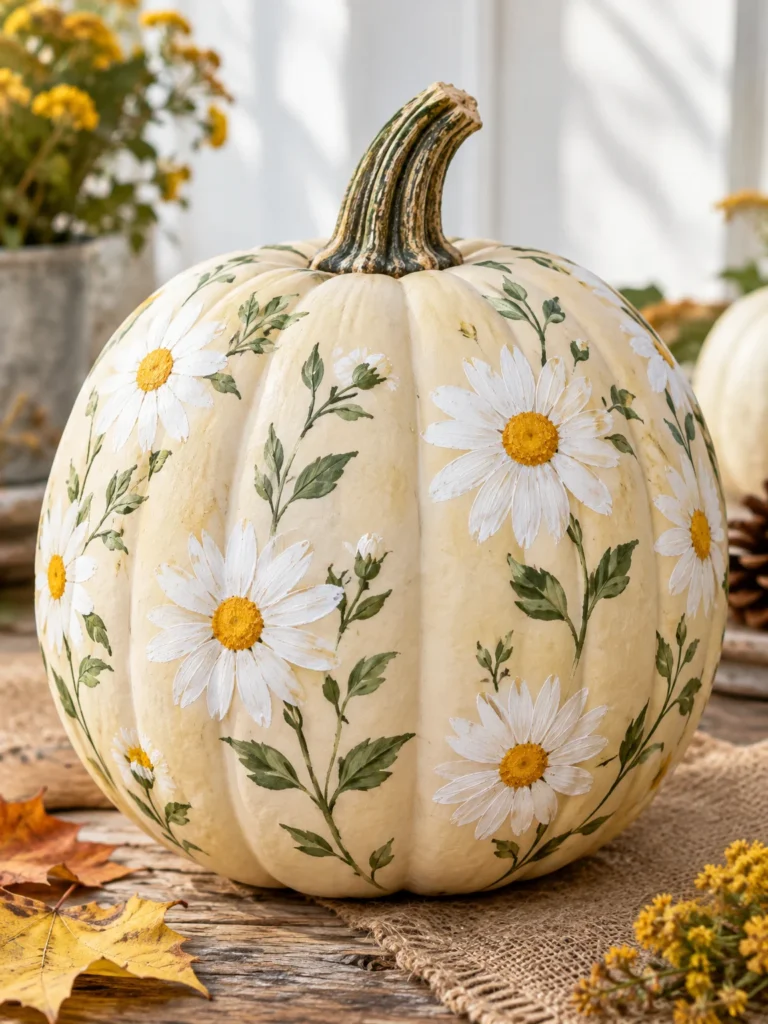
Not every Halloween pumpkin needs a spooky face. A floral design brings an autumn garden look to your decorations and works especially well with cream, white, or pale pink pumpkins.
Paint several daisies across the front, using white petals and yellow centers. Add a few green leaves, then scatter smaller flowers around the main blooms. You can keep the flowers simple rather than painting every petal individually.
For a richer fall palette, replace the bright yellow with mustard, and use rust or burgundy for a few accent flowers. The finished pumpkin looks lovely beside dried foliage or a small vase of seasonal flowers.
Best for: Soft, nature-inspired fall decor.
4. Pink Pumpkin With Tiny Hearts
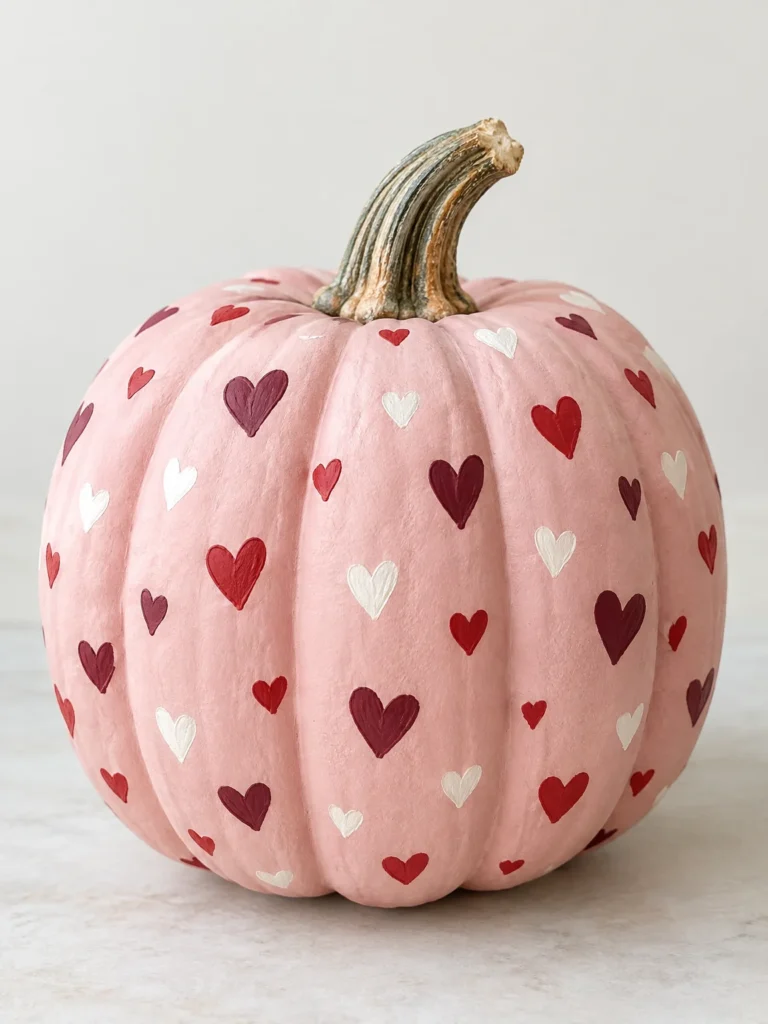
A blush-pink pumpkin covered in little hearts creates a playful alternative to orange-and-black decorations.
Apply two thin coats of pink paint if the pumpkin’s original color shows through. Once dry, add hearts in white, red, burgundy, or a darker shade of pink. The hearts can be scattered randomly or arranged in rows.
Don’t worry about making every shape identical. Slight differences in the size and angle of the hearts give the pattern a handmade quality.
For a coordinated arrangement, combine the finished pumpkin with a plain white pumpkin and a smaller one painted in a complementary shade of pink.
Best for: Whimsical fall decor and colorful indoor displays.
5. Halloween Character Pumpkin Collection
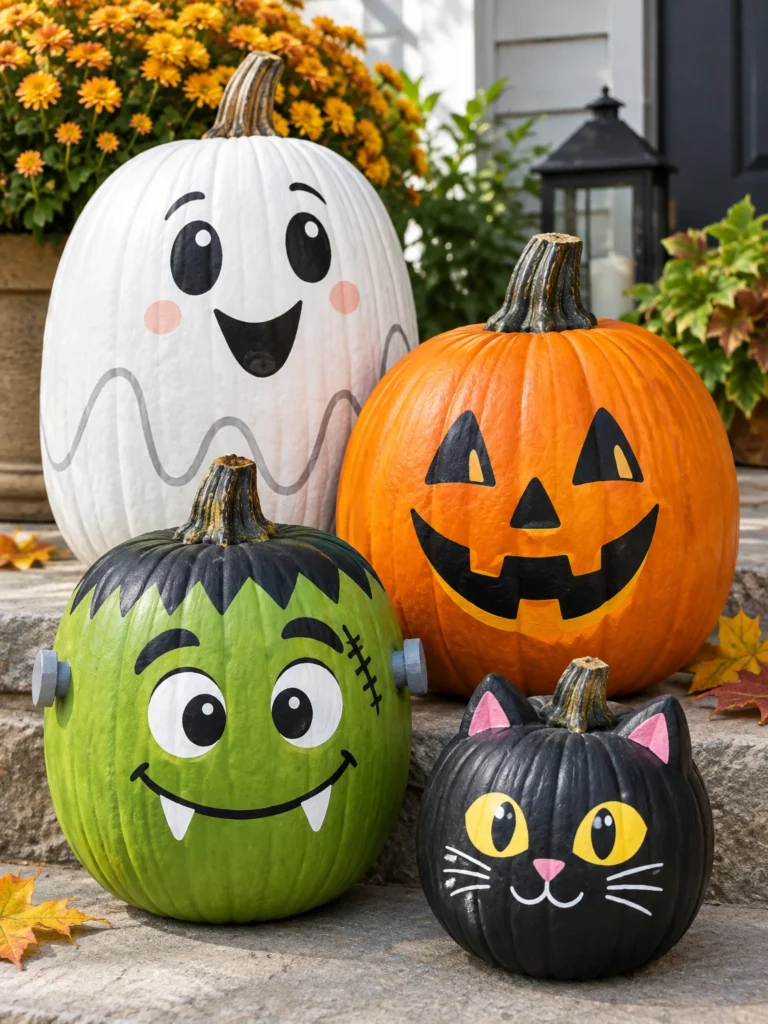
Sometimes a group of simple designs looks more interesting than one elaborate pumpkin. Create a miniature Halloween cast using ghosts, black cats, monsters, and smiling jack-o’-lantern faces.
The secret is to vary the expressions while keeping the color palette consistent. Use orange, white, black, and a little green or purple so the pumpkins look like parts of the same collection.
Arrange the largest pumpkin at the back and smaller ones in front. This creates a layered display on a shelf, console table, or covered porch.
You don’t need to paint every pumpkin from scratch. Some can keep their natural orange color, while others receive a white or black base coat.
Best for: Entryway displays and coordinated Halloween decorations.
6. Black Cat Pumpkin
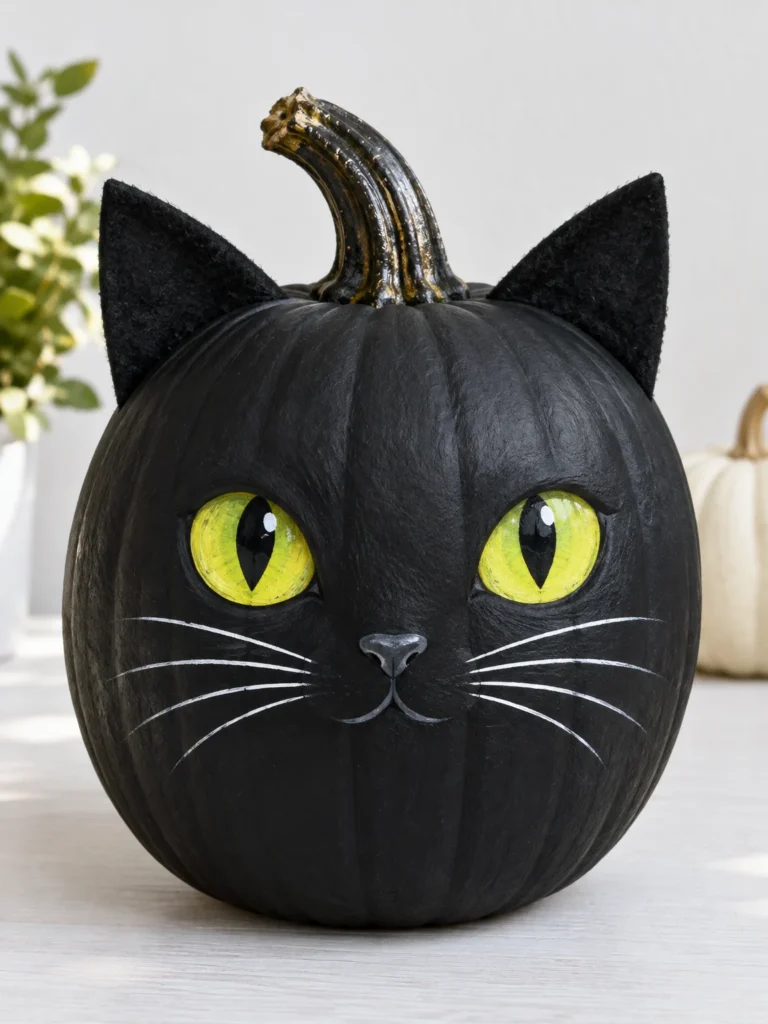
A black cat adds a classic Halloween touch without requiring a complicated design.
Paint the pumpkin black and allow it to dry. Then add two bright yellow or green eyes, a small nose, and thin whiskers. You can paint pointed ears directly onto the upper sides of the pumpkin, or attach lightweight ears made from craft materials once the paint is dry.
For a more expressive face, use narrow eyes and angled eyebrows. For a friendlier look, make the eyes round and add a tiny smile.
A black cat pumpkin looks especially striking beside a white ghost or an unpainted orange pumpkin.
Best for: Traditional Halloween displays with a slightly spooky feel.
7. Frankenstein Monster Pumpkin
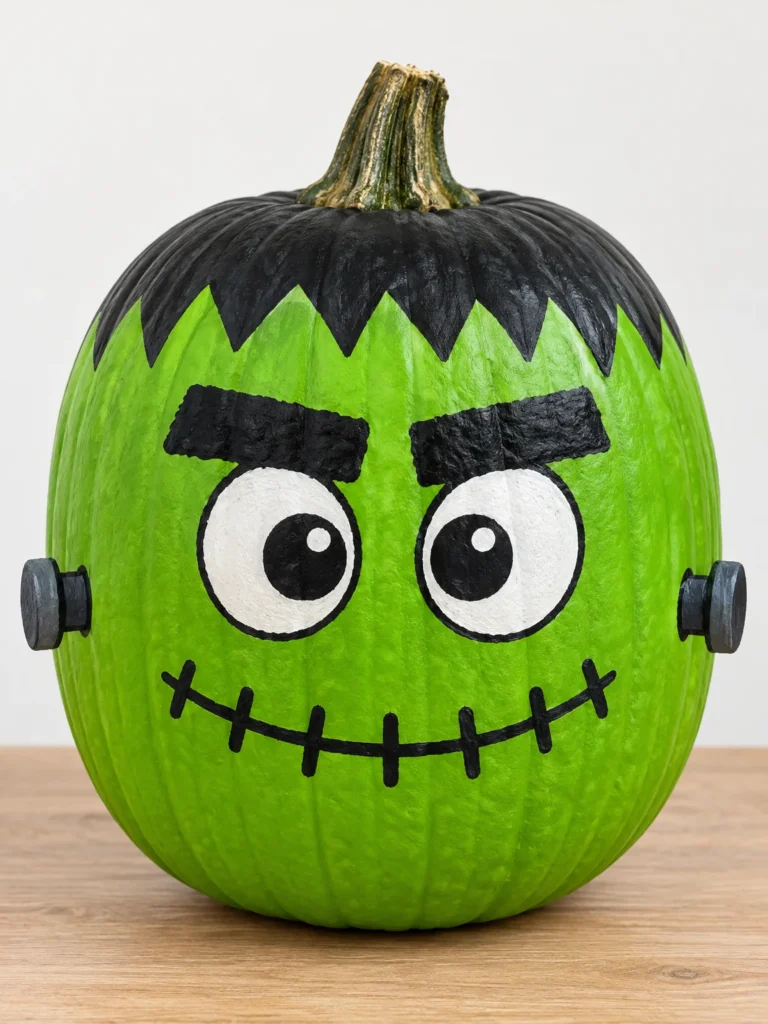
Turn a green pumpkin into a playful Frankenstein-inspired monster with black hair, heavy eyebrows, and a stitched smile.
If you’re starting with an orange pumpkin, apply a green base coat and let it dry before painting the facial features. Make the hair a simple jagged shape across the top, then add two large eyes and short black lines along the mouth.
Small rectangular details on the sides of the face can suggest bolts, although they’re optional. The expression can be goofy or grumpy depending on how you position the eyebrows and mouth.
This design pairs well with ghost and monster pumpkins, particularly when decorating for a family Halloween party.
Best for: Character-themed pumpkin painting.
8. Minion-Inspired Pumpkin
A bright yellow pumpkin with blue overalls and large goggles is a fun choice for a cartoon-inspired display.
Paint the pumpkin yellow first. Add a blue band around the lower portion to suggest overalls, followed by a black goggle strap and one or two large eyes. Finish with a small mouth.
The goggles take the most care, so sketch their outlines lightly before painting. You can simplify the design by using one large eye instead of two.
If you’re making several pumpkins, change the eye positions and facial expressions to give each one a distinct appearance.
Best for: Playful character crafts and family decorating projects.
9. Crescent Moon and Stars
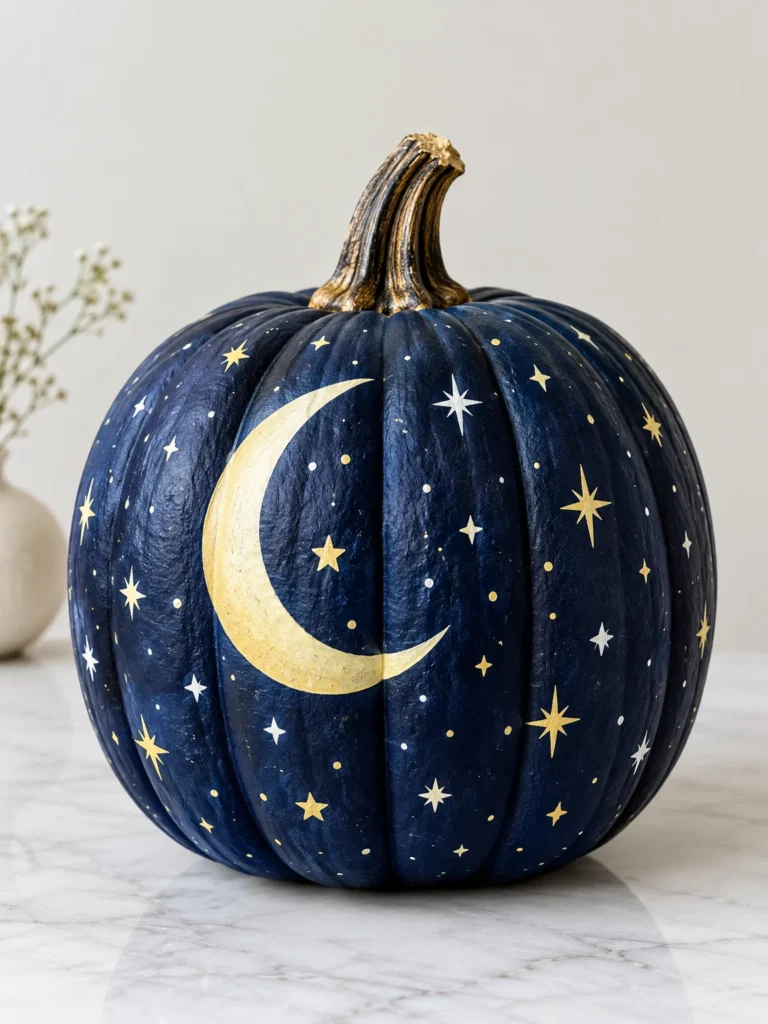
For a Halloween pumpkin that feels a little more mysterious, paint the surface dark navy or black and decorate it with a crescent moon and scattered stars.
Once the base coat is dry, add a pale yellow or white moon on the front. Use small star shapes, dots, and tiny circles to fill the surrounding space without overcrowding it.
You can keep the design minimal with just a few stars, or create a fuller night-sky pattern that extends around the pumpkin.
This is a good option if you enjoy Halloween decor but prefer not to display cartoon faces or bright character designs.
Best for: Moody Halloween arrangements and mantel styling.
10. White Pumpkin With Black Doodles
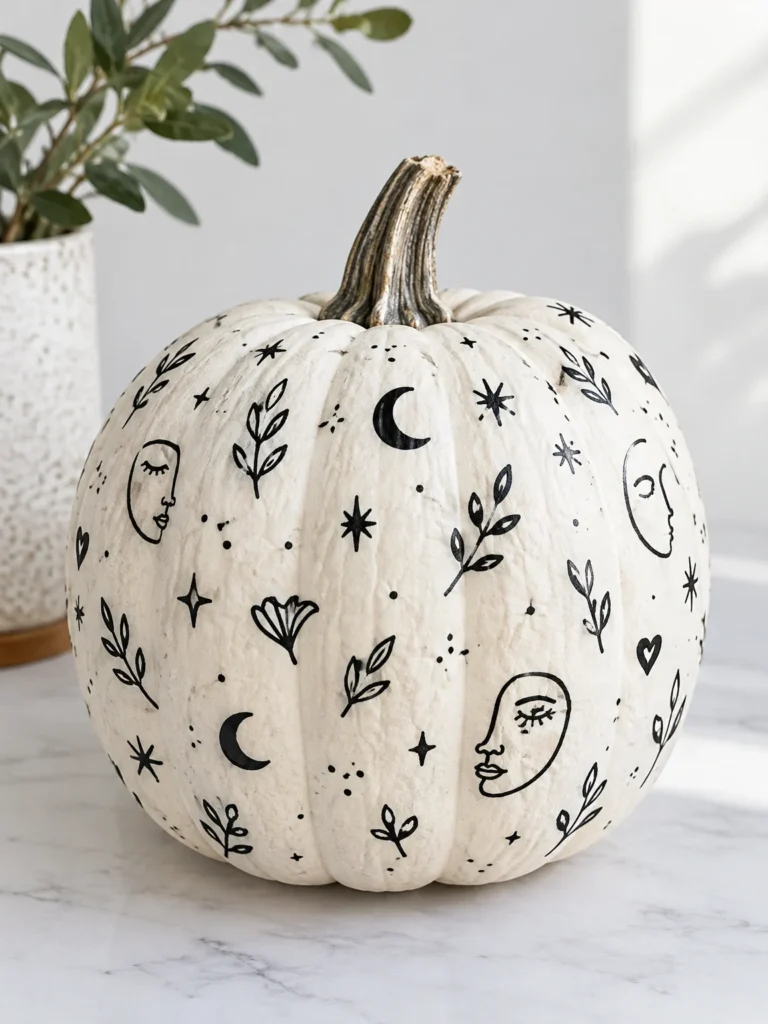
Black doodles on a white pumpkin create a clean, graphic look that doesn’t require much drawing experience.
Start with a white base, then use a black paint pen or fine brush to add small moons, stars, hearts, leaves, dots, or simple abstract faces. Mix the shapes rather than repeating the same symbol across the entire surface.
Leaving a little white space between the drawings helps the design stay readable. If you prefer a more orderly pattern, repeat three or four simple shapes in a loose grid.
Pair the finished pumpkin with black accessories or plain white decorations for a coordinated display.
Best for: Modern, minimalist Halloween decor.
11. Polka-Dot Pumpkin
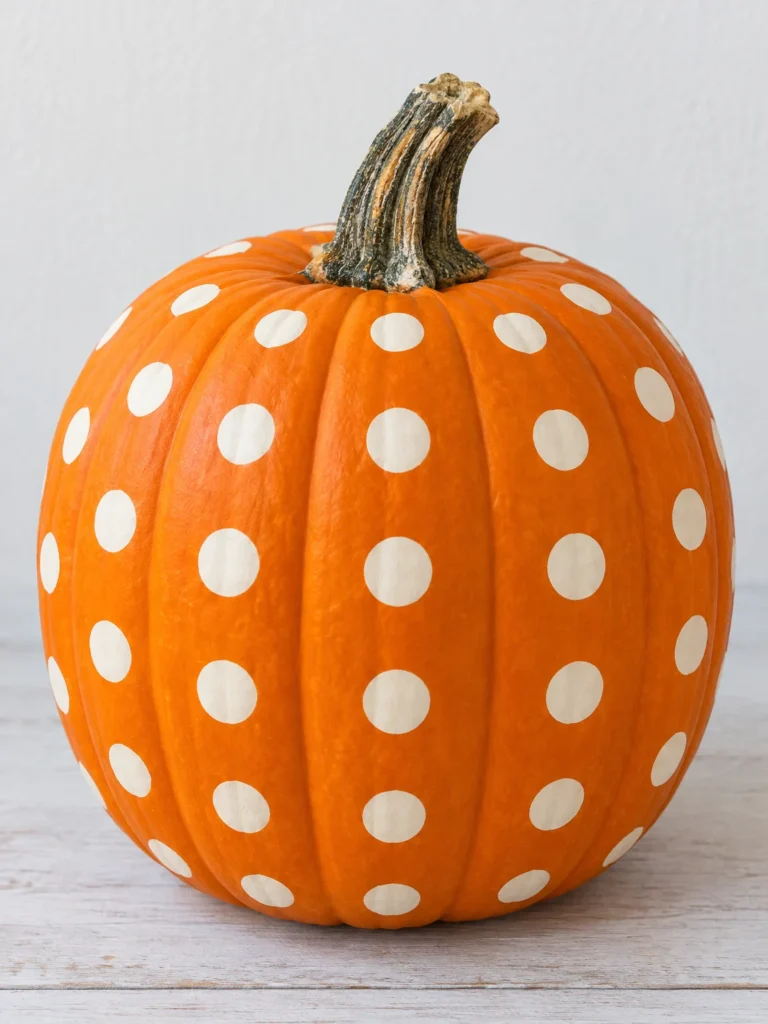
Polka dots are ideal when you want an attractive painted pumpkin without drawing detailed illustrations.
Choose a base color such as white, orange, green, or pink. Once dry, add dots in a contrasting shade using a small round brush or the rounded end of a paintbrush handle.
For a more playful result, vary the size of the dots. For a neat, contemporary look, keep them approximately the same size and distribute them evenly.
White dots on orange create a cheerful Halloween design, while black dots on cream feel more understated. You can also use several colors if the rest of your fall decorations are bright.
Best for: Beginners and quick decorating projects.
12. Checkerboard Pumpkin
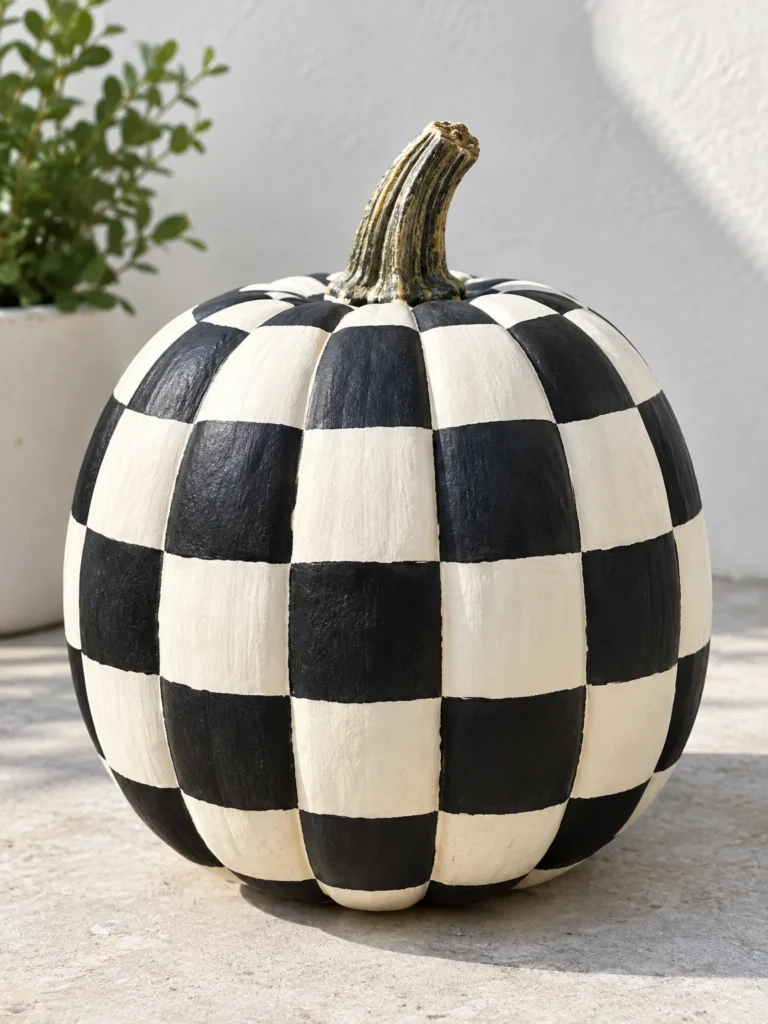
A checkerboard pattern gives a pumpkin a bold, high-contrast appearance.
Start with a light base color, such as white or cream. Lightly sketch a grid around the pumpkin, following its curves as best you can. Paint alternating squares black, allowing each section to dry before handling it again.
A small flat brush helps control the edges. On a deeply ridged pumpkin, don’t worry about achieving perfectly straight lines; the natural surface can make a handmade pattern look more interesting.
For a warmer version, use orange and cream instead of black and white.
Best for: Graphic Halloween displays and statement decorations.
13. Bumblebee Pumpkin
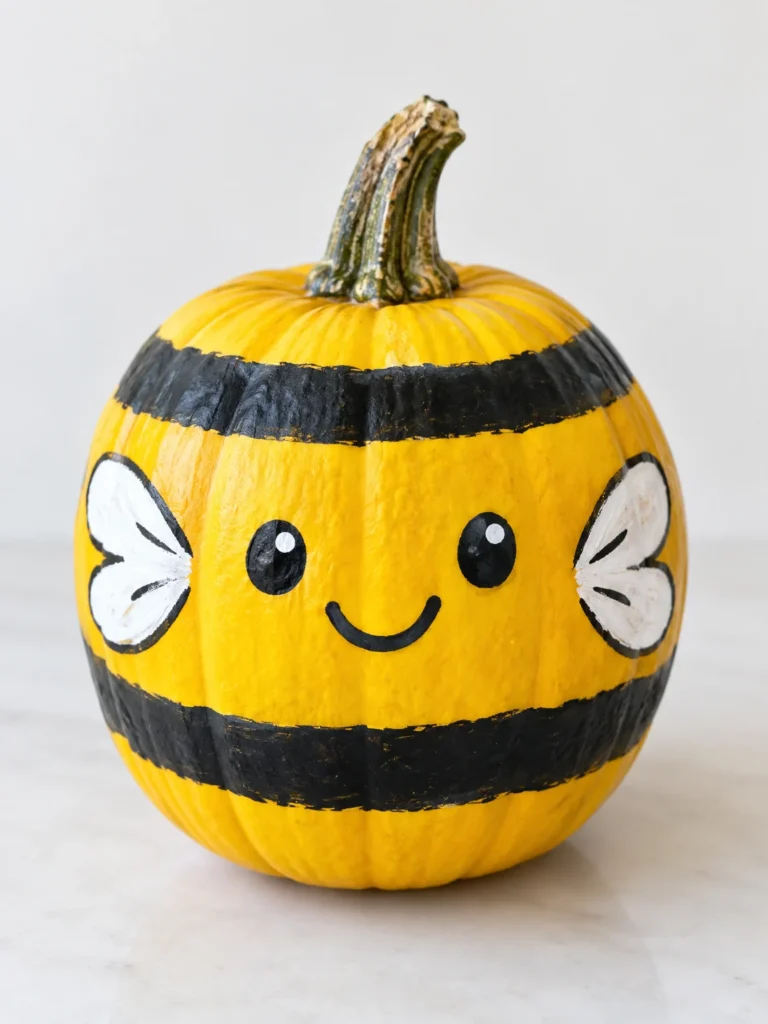
A yellow pumpkin with black stripes brings a cheerful, nature-inspired twist to fall decorating.
Paint the pumpkin yellow and add two or three black bands around the sides. On the front, paint two eyes and a small smile. If you want to make the bee easier to recognize, add simple white wings near the upper sides.
The stripes don’t have to be perfectly straight. Follow the pumpkin’s shape, and keep the face relatively simple so it remains visible.
Arrange this design with other cheerful painted pumpkins, or add a few artificial sunflowers to create a small seasonal display.
Best for: Bright, playful pumpkin collections.
14. Strawberry-Inspired Pumpkin
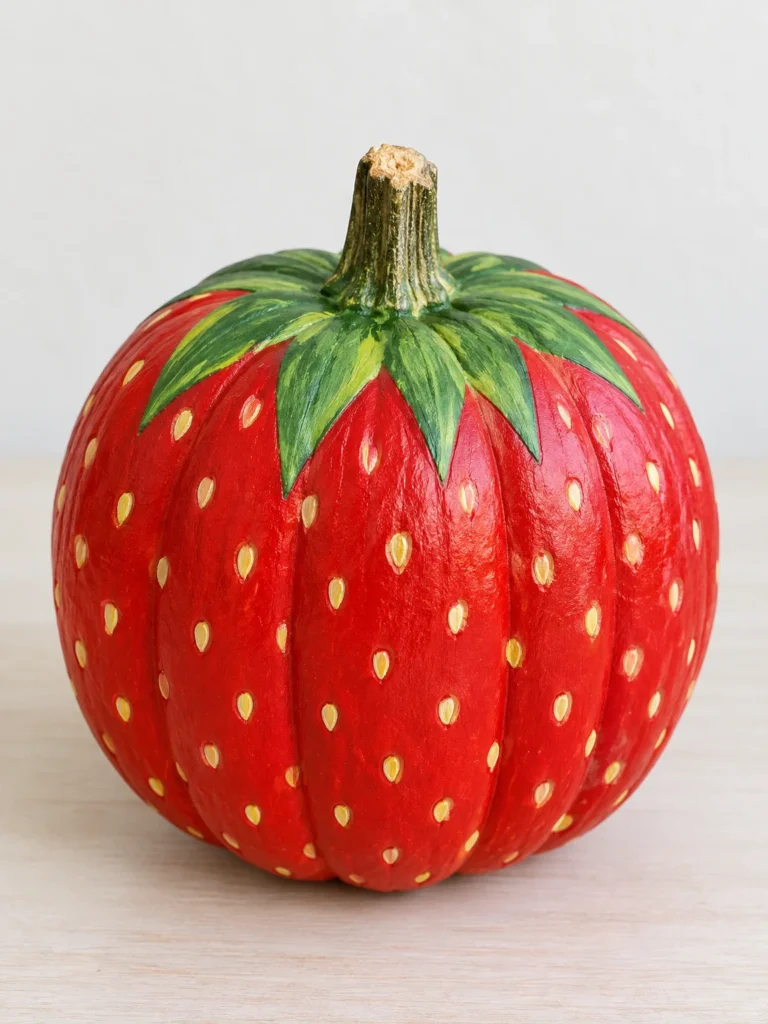
For something unexpected, turn a small pumpkin into a strawberry-inspired decoration.
Paint the entire surface red or pink-red. Add tiny pale yellow or white marks to represent seeds, then paint green leaves around the stem. A small brush helps keep the seeds from becoming too large.
The green leaves can be simple pointed shapes, so there’s no need to paint a detailed botanical illustration. You can also leave some areas of the red base uncovered to keep the design from looking crowded.
This idea works particularly well in a kitchen or craft display where traditional Halloween colors aren’t the main focus.
Best for: Fruit-inspired decor and playful painted pumpkins.
15. Sunflower Pumpkin
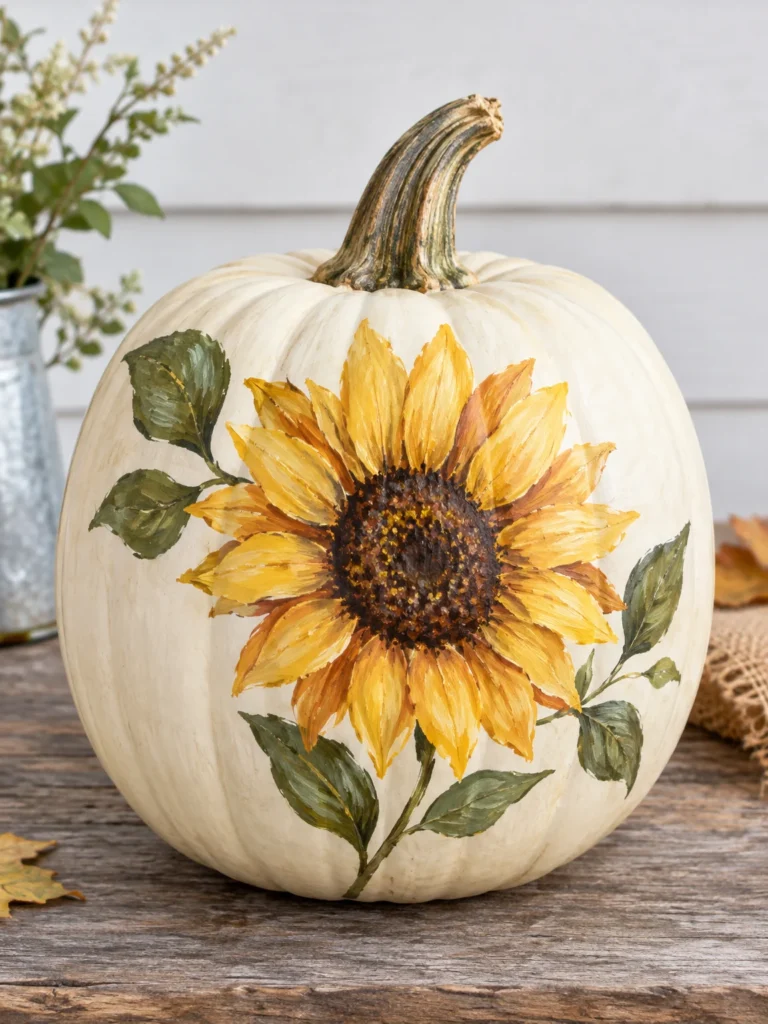
Sunflowers and autumn colors naturally complement each other, making this a good design for decorating throughout the fall season.
Use an orange, cream, or muted green pumpkin as your base. Paint one large sunflower on the front, with golden-yellow petals surrounding a brown center. Add a few green leaves to balance the composition.
If the pumpkin has deep ridges, position the main flower where it can be seen easily from the front. Smaller flowers can be added around the sides.
Pair the finished pumpkin with dried leaves, a rustic tray, or other natural textures for a warm autumn display.
Best for: Fall centerpieces and seasonal home decor.
16. Rainbow Pumpkin
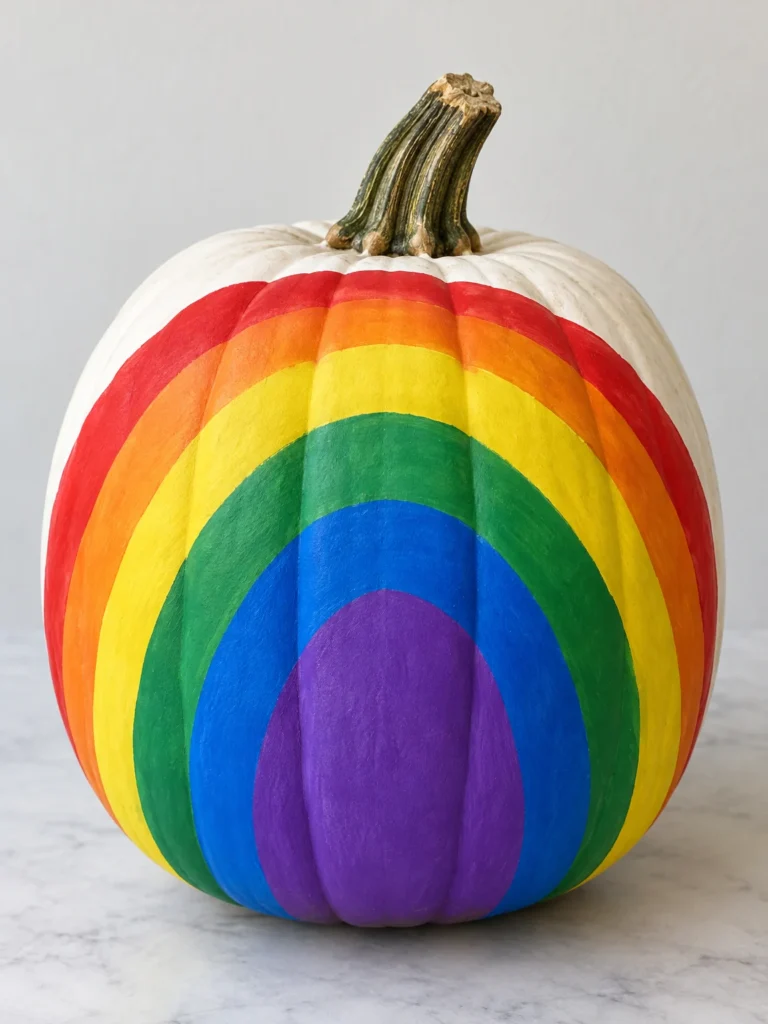
A rainbow design is a simple way to bring several colors into your fall decorations.
Paint curved stripes across the front of a pumpkin in your preferred rainbow colors. Alternatively, use the pumpkin’s natural ribs as guides and paint each section a different shade.
Allow neighboring colors to dry before working on adjacent areas, particularly when they’re likely to overlap. You can finish the design with small white clouds or keep the rainbow on its own.
For a more balanced display, place the colorful pumpkin beside one or two solid-colored pumpkins rather than surrounding it with many other busy patterns.
Best for: Colorful fall crafts and playful displays.
17. Woodland Mushroom Pumpkin
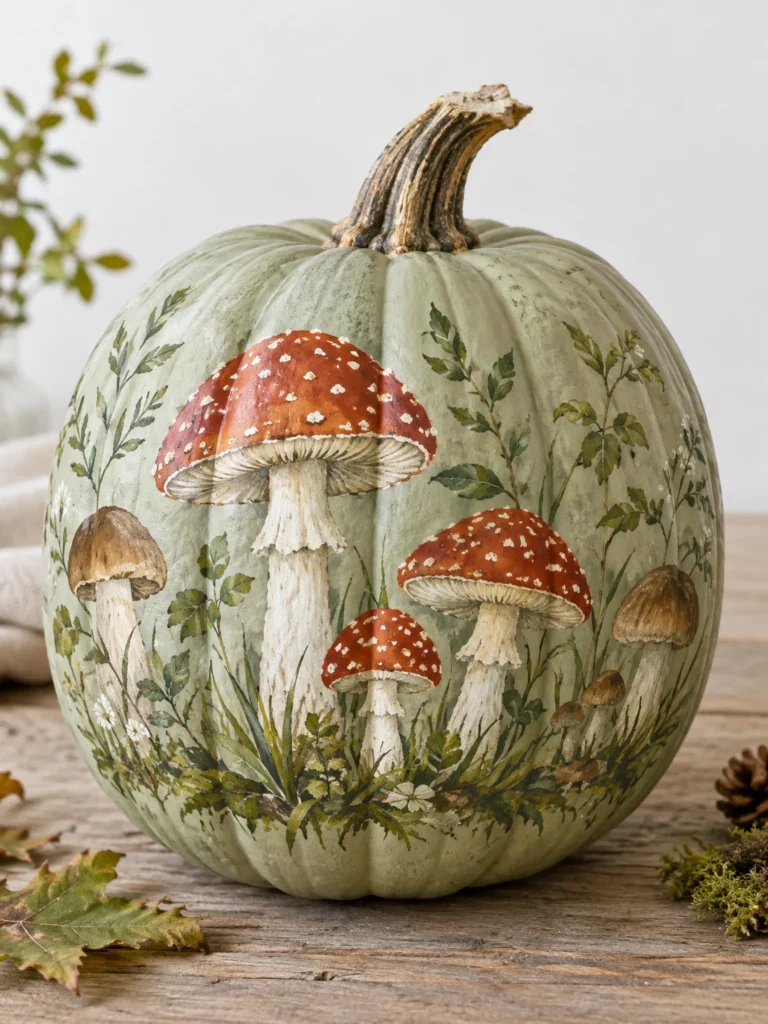
Create a tiny woodland scene by painting mushrooms and toadstools on a cream or pale green pumpkin.
Use rust-red or burgundy caps, pale stems, and small white spots. Add a few leaves, grass blades, and dots around the mushrooms to give the design a garden-like feel.
You can paint one larger mushroom as the main feature or scatter several small ones across the surface. Simple shapes work well here, so you don’t need to draw intricate stems or shadows.
This design looks especially nice with natural wood accessories, miniature woodland decorations, and other painted pumpkins in earthy colors.
Best for: Woodland-inspired and storybook-style fall decor.
18. Leopard-Print Pumpkin
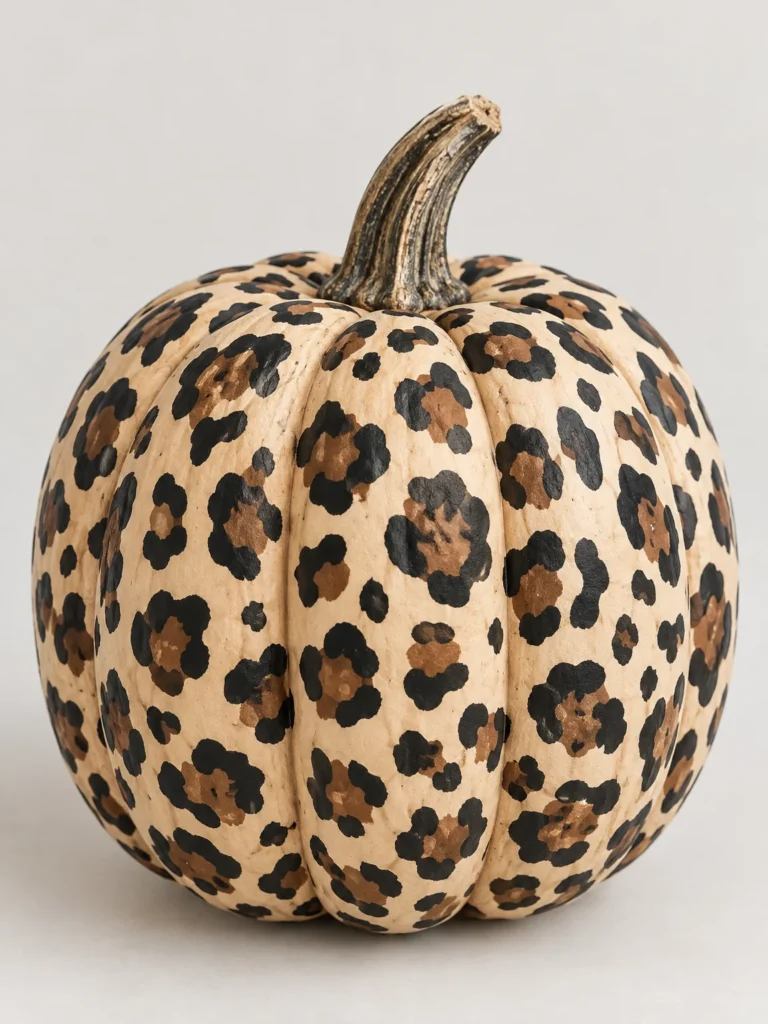
A leopard-print pumpkin is a bold option if you prefer patterns to faces and characters.
Choose a tan, cream, or orange base. After it dries, paint irregular dark brown or black markings around the surface. Make some marks small and rounded, and others larger with uneven edges.
Avoid arranging the spots in perfectly spaced rows. A scattered pattern looks more natural and is easier to adapt around the pumpkin’s ridges.
The print can stand on its own as a statement piece. Pair it with plain black, white, or orange pumpkins so the pattern remains the focal point.
Best for: Bold, modern seasonal decor.
19. Candy Corn Pumpkin
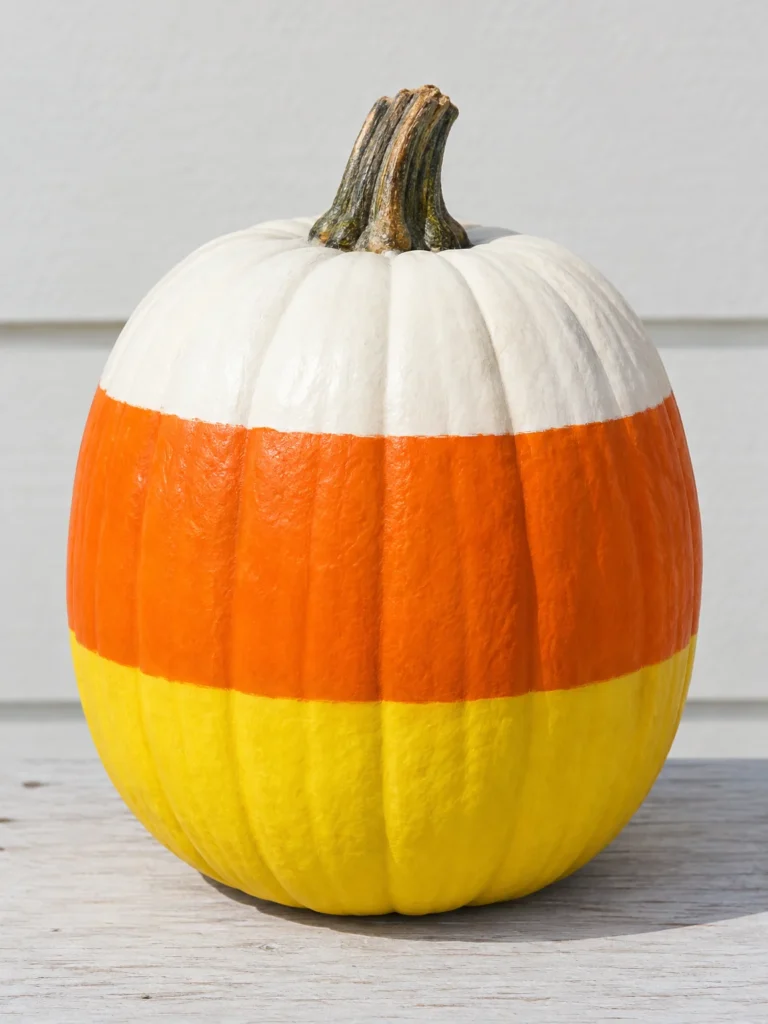
Candy corn’s familiar white, orange, and yellow colors make a straightforward Halloween painting project.
Divide the pumpkin into three horizontal sections. Paint the upper section white, the middle orange, and the lower section yellow. Let each layer dry before applying the next to help keep the colors distinct.
You can use painter’s tape to guide the boundaries, although the shape of the pumpkin may make perfectly level lines difficult. A little variation is fine.
For an extra playful touch, add a tiny face to the front or paint a few small candy-corn shapes around the sides.
Best for: Traditional Halloween color schemes and beginner-friendly crafts.
20. Abstract Brushstroke Pumpkin
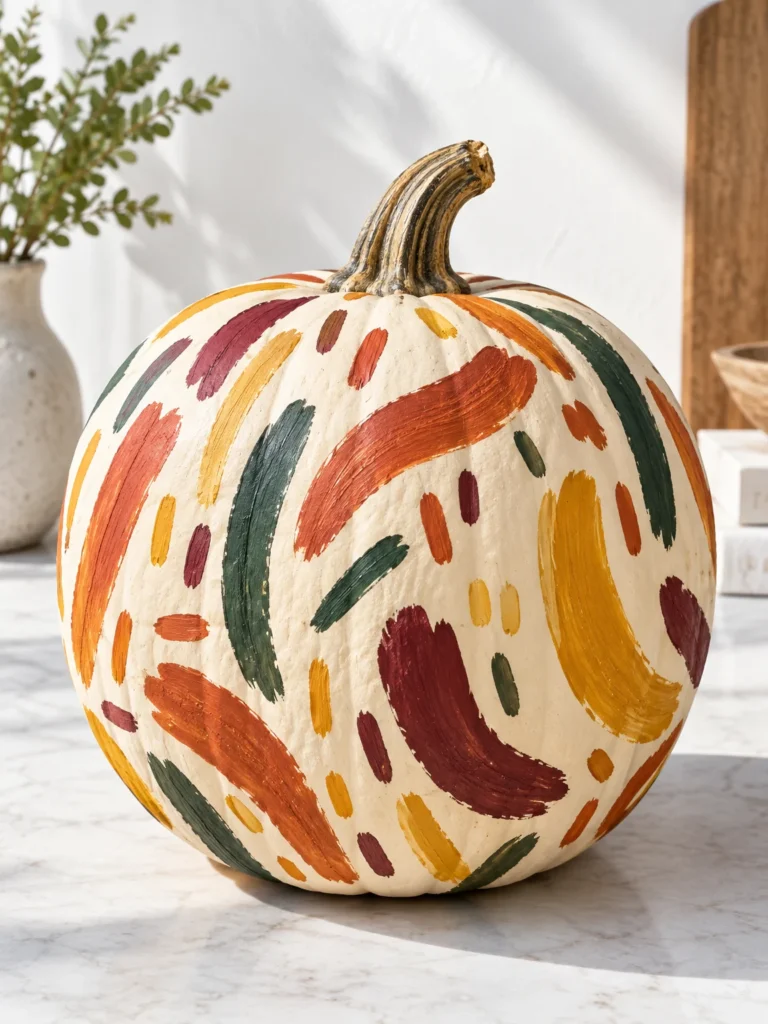
If drawing faces and recognizable objects isn’t your style, try an abstract design made from loose brushstrokes.
Begin with a white or cream base, then add strokes of terracotta, mustard yellow, burgundy, dark green, or dusty pink. Mix short dashes with longer curved strokes, leaving some of the base visible.
You don’t need to cover every part of the pumpkin. An uneven arrangement often looks more interesting than a completely filled surface.
Choose two or three colors for a restrained result, or use a larger palette for something brighter. The design is flexible enough to suit both modern fall decor and more traditional autumn displays.
Best for: Artistic, contemporary pumpkin decorations.
21. Personalized Initial Pumpkin
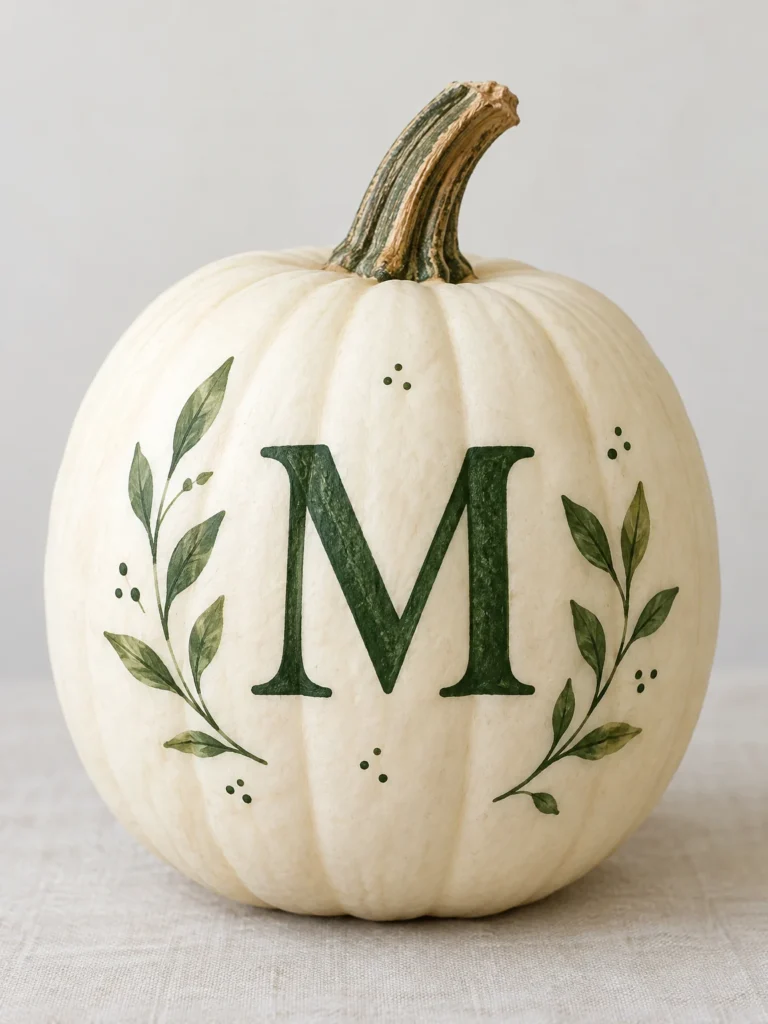
A pumpkin featuring an initial makes a simple decoration feel more personal.
Paint the pumpkin in a solid color, such as cream, black, orange, or sage green. When the base coat is dry, paint a large initial on the front in a contrasting shade. A stencil can help with lettering, while freehand lettering creates a more relaxed look.
Decorate around the letter with tiny stars, leaves, flowers, or dots if you want more detail. Keep the surrounding pattern simple enough that the initial remains easy to see.
Use personalized pumpkins on an entryway table, a desk, or a fall dining table. For a gathering, each pumpkin can feature a different initial while sharing the same color scheme.
Best for: Personalized seasonal decorations and fall gatherings.
How to Get the Best Results When Painting Pumpkins
A little preparation makes it easier to achieve a neat finish, especially when you’re working with curved surfaces.
Choose the Right Pumpkin
Look for a pumpkin that sits securely on a flat surface and has relatively smooth areas for the main design. A small pumpkin is easier to handle for detailed characters, while a larger one gives you more space for flowers, lettering, or repeating patterns.
Real pumpkins work well for seasonal displays, but they eventually deteriorate. Artificial craft pumpkins are useful when you want to store and reuse your designs.
Prepare the Surface
Wipe the pumpkin with a dry or slightly damp cloth to remove dirt, then let it dry completely. If you’re using an artificial pumpkin, follow the manufacturer’s recommendations for cleaning and painting its surface.
Avoid applying paint to a wet or dirty surface, as this can interfere with the finish.
Work in Thin Layers
Apply paint in thin coats rather than trying to cover everything at once. Let each layer dry according to the product instructions before adding another coat or painting details.
Use larger brushes for base colors and smaller brushes for eyes, lettering, dots, and other fine details. Paint pens can be particularly helpful for small designs, provided they’re compatible with the surface.
Keep the Design Manageable
When painting your first pumpkin, stick to a few recognizable shapes. A ghost needs only a white base and a simple face. A polka-dot design needs just two colors. You can add more details as your confidence grows.
If you’re making a set of pumpkins, choose one or two shared colors to tie the designs together without making every pumpkin look identical.
Protect Your Finished Pumpkin
Keep painted real pumpkins in a cool, dry location away from excessive heat and moisture. Check them periodically for soft spots or other signs of deterioration.
If you plan to use a clear protective coating, make sure it’s compatible with the paint and the pumpkin’s surface, and follow the manufacturer’s directions. A coating won’t prevent a real pumpkin from eventually spoiling.
For reusable decorations, an artificial pumpkin is the more practical choice.
Frequently Asked Questions
What is the easiest thing to paint on a pumpkin?
Polka dots, simple stripes, hearts, stars, and ghost faces are among the easiest designs to try. They use basic shapes rather than detailed drawings, making them suitable for beginners.
What kind of paint should you use on pumpkins?
Acrylic craft paint is a common choice for both real and artificial pumpkins. Check the paint label to confirm that it’s suitable for the surface you’re using, and let it dry according to the manufacturer’s directions.
Is it better to paint a real pumpkin or a fake pumpkin?
A real pumpkin is a natural choice for a seasonal display, but it eventually decomposes. An artificial craft pumpkin can be stored and reused, making it more practical for decorations you want to keep for several years.
How can you paint pumpkins with kids?
Choose simple designs such as polka dots, smiling faces, rainbows, and flowers. Protect the work surface and select age-appropriate art supplies. Younger children should be supervised, and paint should be kept away from food and mouths.
Can you paint a pumpkin without carving it?
Yes. Clean and dry the outer surface, then apply paint directly to the pumpkin. You can create faces, patterns, flowers, and characters without cutting into the shell.
Find a Pumpkin Painting Idea That Fits Your Style
The best pumpkin painting project isn’t necessarily the most complicated one. A white ghost, a flower-covered pumpkin, or a bright checkerboard pattern can look just as appealing as an elaborate character when the colors and details are thoughtfully chosen.
Start with a design you can comfortably paint, then decide whether you’d like to make one statement pumpkin or a small collection of coordinating decorations. With a few basic supplies and a little patience between coats, you can create a no-carve Halloween display that feels personal and fits your home.