A plain plastic pumpkin bucket is easy to find, but it can look a lot more personal with a few well-placed rhinestones. These 10 bedazzled pumpkin bucket ideas range from pink bows and rainbow crystals to gothic spiderwebs and candy-corn stripes. Each design uses a different approach, so you can choose one that matches your costume, crafting skills, and budget without covering the entire bucket in gems.
1. Black-and-Gold Glam Pumpkin Bucket
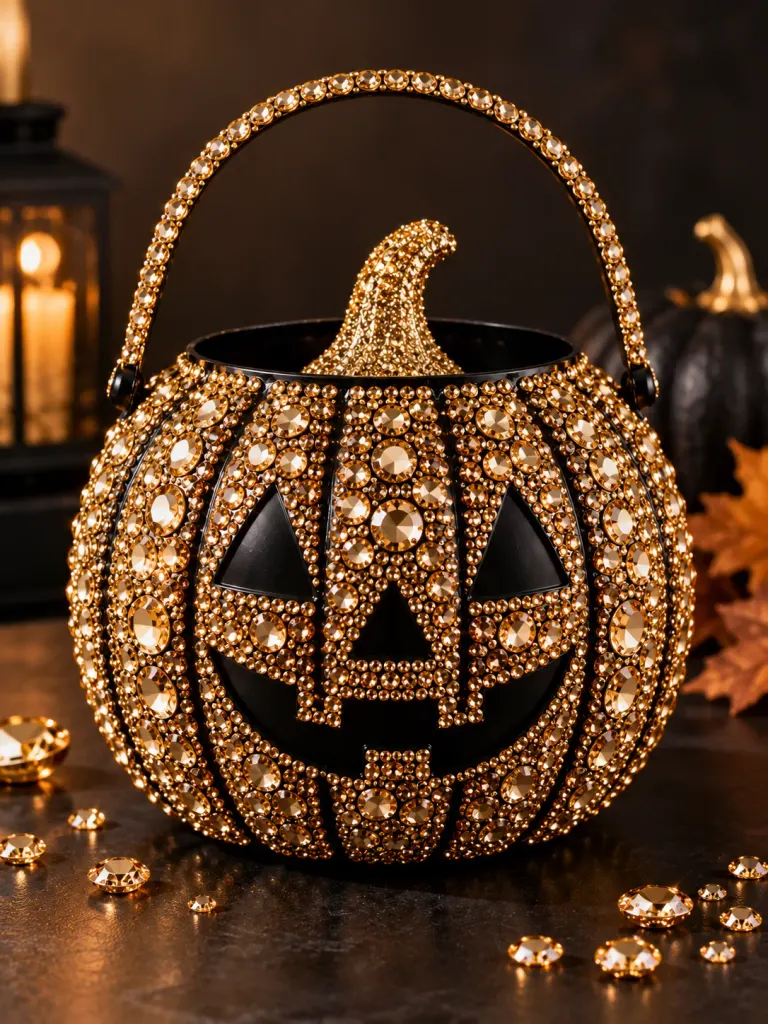
Black and gold create a striking contrast against an orange pumpkin bucket. This design works particularly well when you decorate the molded jack-o’-lantern face instead of covering every inch of the surface.
Outline the eyes and mouth with small black rhinestones, then place gold gems around the edges. Finish with a narrow gold border along the front rim if you want a more polished appearance.
The trick is to let the orange plastic remain visible. Three colors and a defined pattern usually look more intentional than a random mixture of leftover gems.
Make it your own: Swap the gold stones for silver to create a cooler, metallic look that works with a black or silver Halloween costume.
2. Pink Rhinestones and a Statement Bow
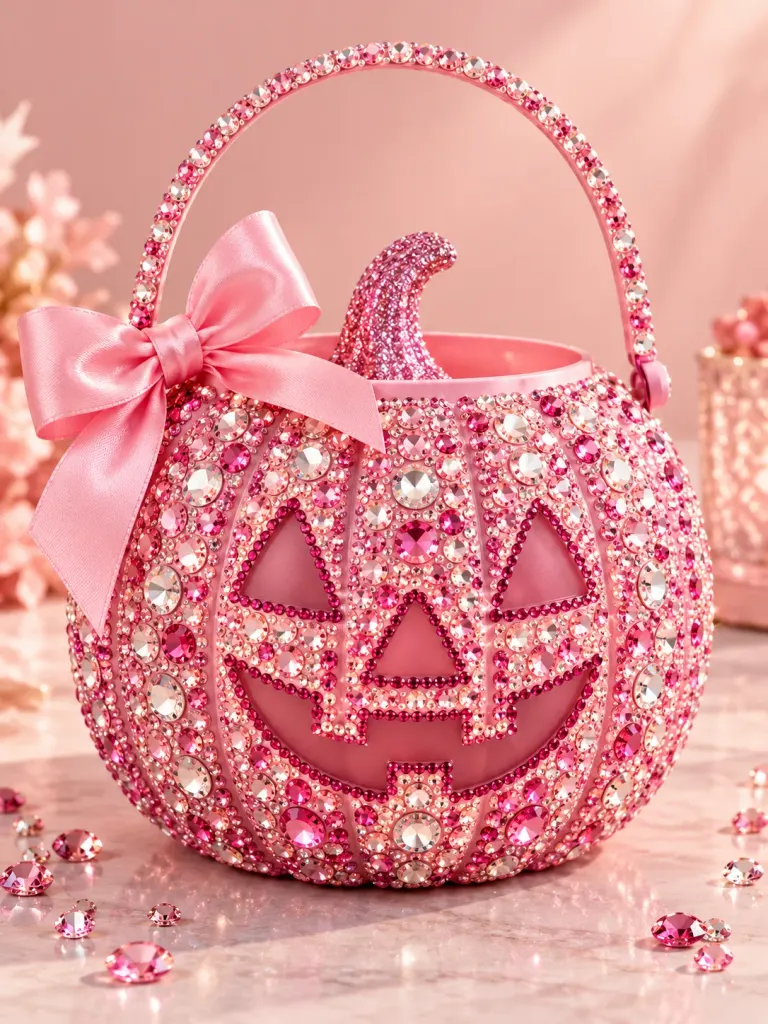
For a softer, playful design, combine pink rhinestones with one statement bow. The orange pumpkin provides a bright base, while pink and clear gems give it a more coordinated look.
Choose one shade of pink for a simple design, or combine blush and hot pink for contrast. Arrange the stones around the eyes or create a curved cluster across the upper front of the bucket. Attach a satin bow to the center or just below the rim, keeping the handle attachments clear.
A large bow provides a focal point without requiring dozens of embellishments. If the bucket will be carried by a child, secure the bow firmly and avoid long tails that could snag during trick-or-treating.
3. Celestial Moon-and-Star Bucket
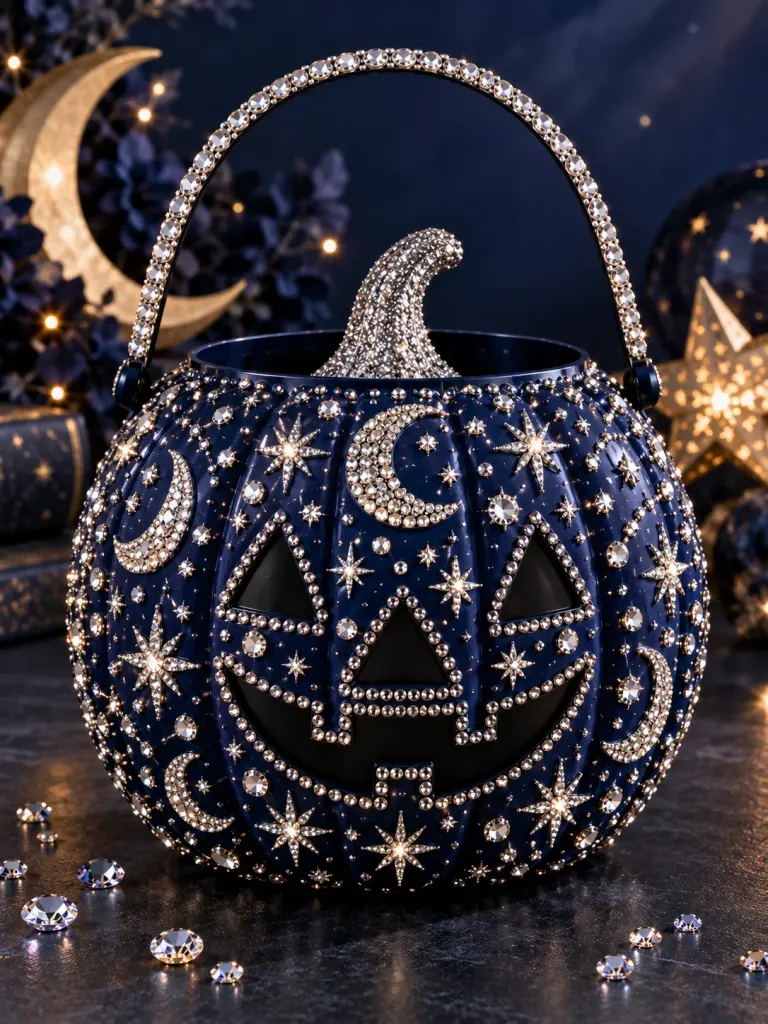
A celestial design uses negative space as part of the decoration. Instead of filling the surface with gems, arrange silver and iridescent rhinestones into moons, stars, and small constellation-like patterns.
A black or deep-purple bucket makes the crystals stand out. Place one larger crescent moon near the top, add three starbursts below it, and scatter a few smaller stones around the shapes.
You can outline the motifs with individual rhinestones or use ready-made star embellishments where their adhesive is compatible with the bucket.
Design detail: Keep the largest motif on the broad front panel so it remains visible even when the bucket is being carried.
4. Ombré Rhinestone Pumpkin Bucket
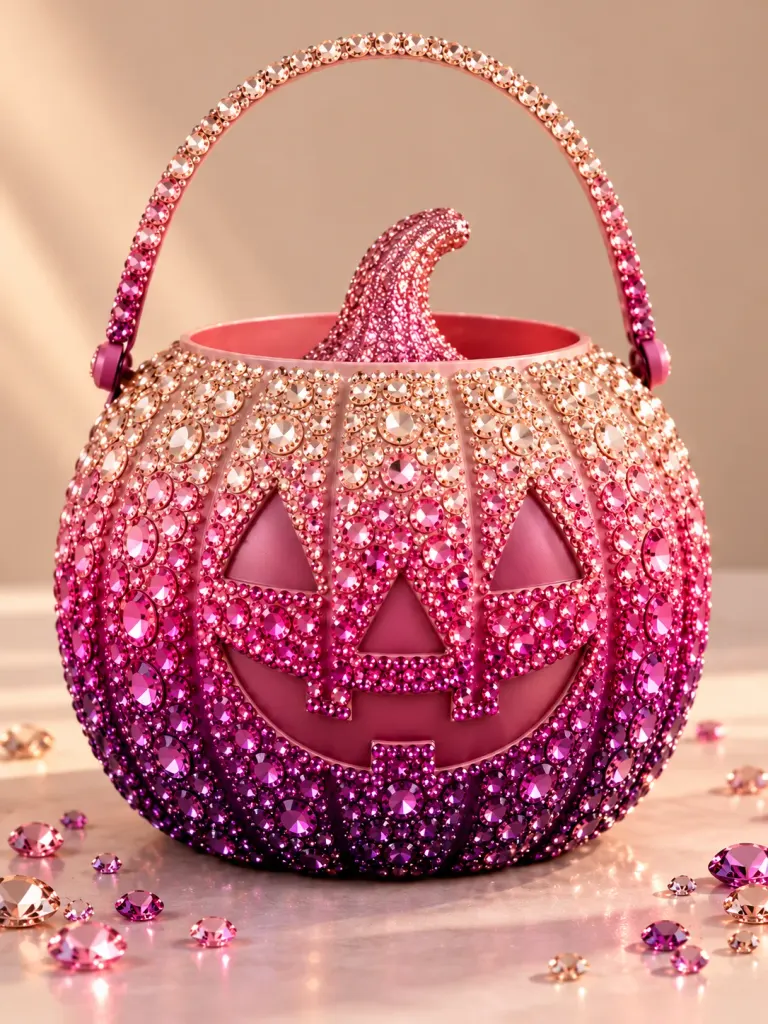
An ombré design gradually shifts from one color to another, making it a good choice when you want lots of sparkle without a busy pattern.
Pick three related colors, such as pale pink, hot pink, and magenta. Place the lightest stones at one end of the decorated area, transition through the middle shade, and finish with the darkest gems.
Before attaching anything, arrange a few rows on paper to determine where each color should change. This is especially helpful when using individual stones, because the curved bucket surface can make the gradient appear uneven if the rows aren’t planned.
For a traditional Halloween palette, try yellow-orange-red instead. The gradual color transition gives the bucket a different look from the usual single-color rhinestone design.
5. Rainbow Disco Pumpkin Bucket
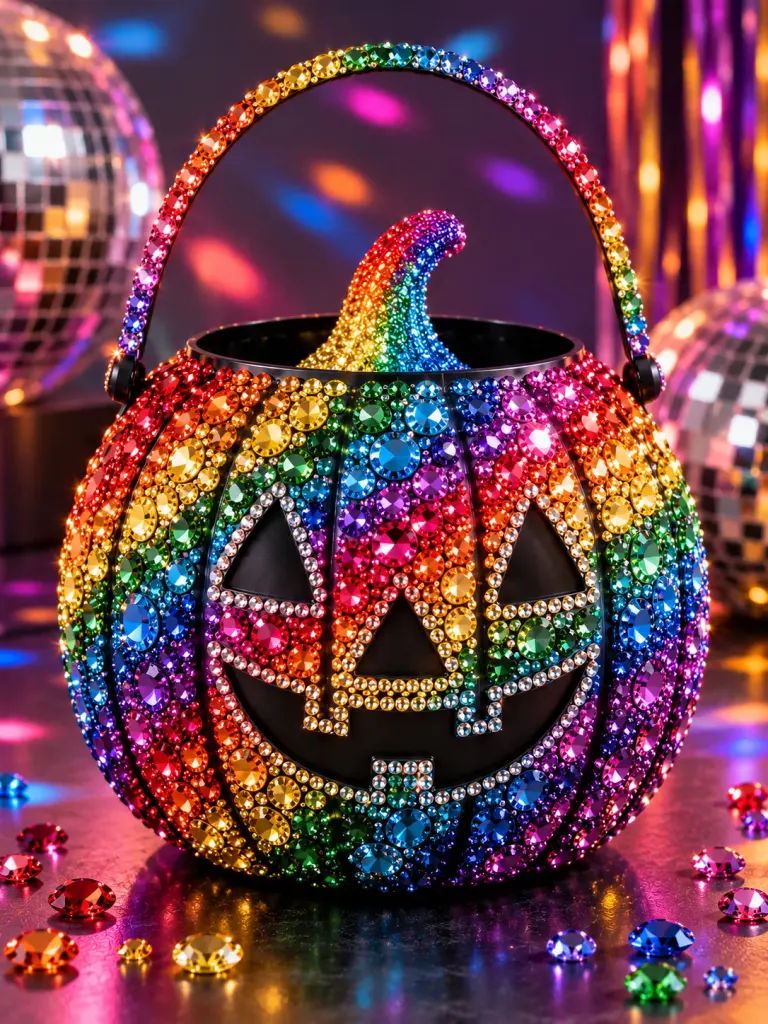
This design is all about colorful shine. Combine red, orange, yellow, green, blue, and purple rhinestones with a few clear or iridescent accents.
There are two straightforward ways to arrange the stones. Curved rainbow rows create a recognizable pattern, while a more scattered arrangement gives the bucket a playful, disco-inspired finish.
Use larger gems sparingly as focal points and smaller flat-back stones for the surrounding detail. This helps keep the surface manageable and reduces the chance that bulky decorations will catch on clothing or other bags.
For a more restrained version, decorate only the front of the bucket and leave the sides orange.
6. Gothic Spiderweb Pumpkin Bucket
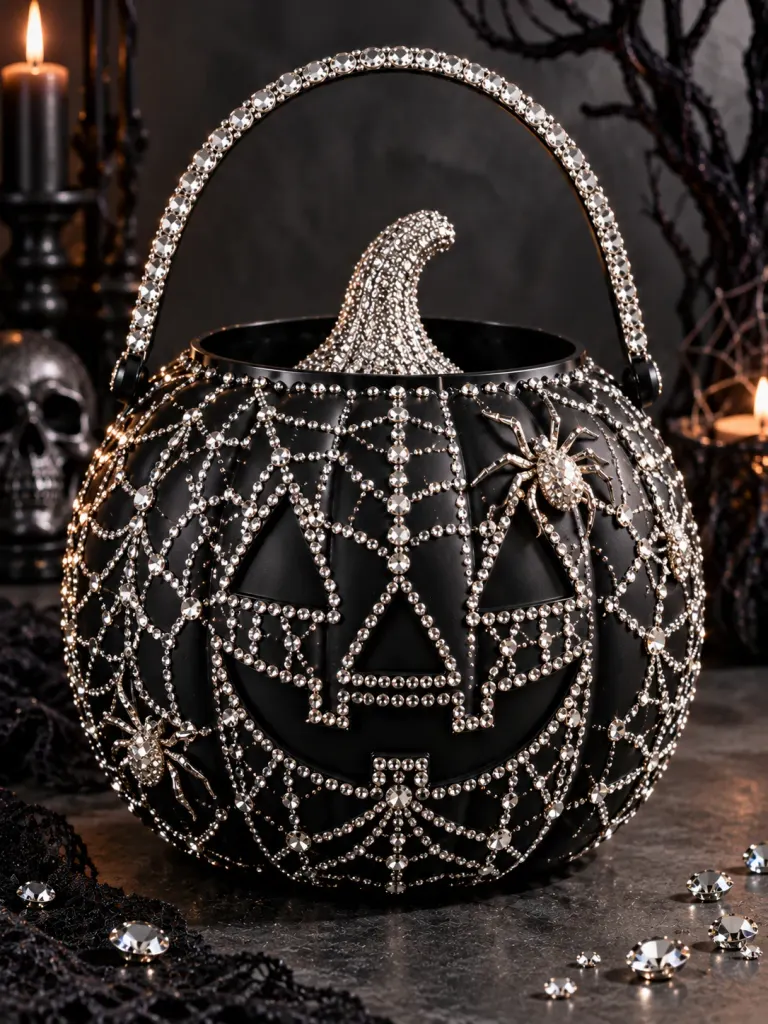
Rather than simply adding black crystals to a pumpkin face, build the decoration around a spiderweb motif. This gives the gothic design a clear shape that separates it from a conventional rhinestone-covered bucket.
Start with a black bucket, or use the original orange one for a brighter contrast. Arrange black rhinestones into radiating lines, then connect them with smaller curved sections to suggest a web. Add a few dark-red or purple stones at selected intersections.
A small spider embellishment can complete the pattern, provided it can be attached securely and doesn’t have delicate legs that bend easily.
Best design choice: Use the web as the main feature on one side, rather than repeating it across the entire bucket. The open areas make the individual lines easier to see.
7. Checkerboard Rhinestone Pumpkin Bucket
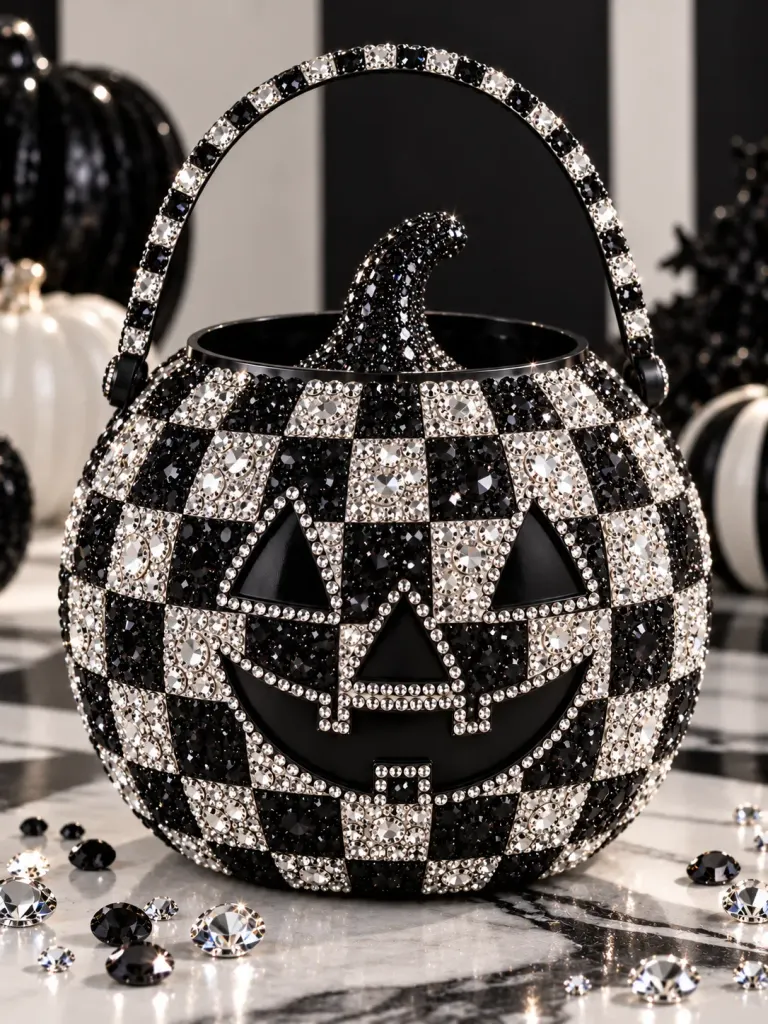
A checkerboard pattern is a good alternative to scattered crystals or decorative outlines. It works particularly well with black and clear stones, pink and silver, or purple and iridescent white.
Mark out a small grid on paper first. Arrange the stones in alternating colors, then transfer the pattern to the broad front of the bucket.
Because pumpkin pails often have rounded faces, a large grid may distort around the edges. Keep the checkerboard within the flattest area rather than trying to wrap a rigid pattern around the whole bucket.
For a simpler project, use the checkerboard as a narrow band below the rim. It creates a recognizable geometric detail without requiring full coverage.
8. Personalized Name or Initial Bucket
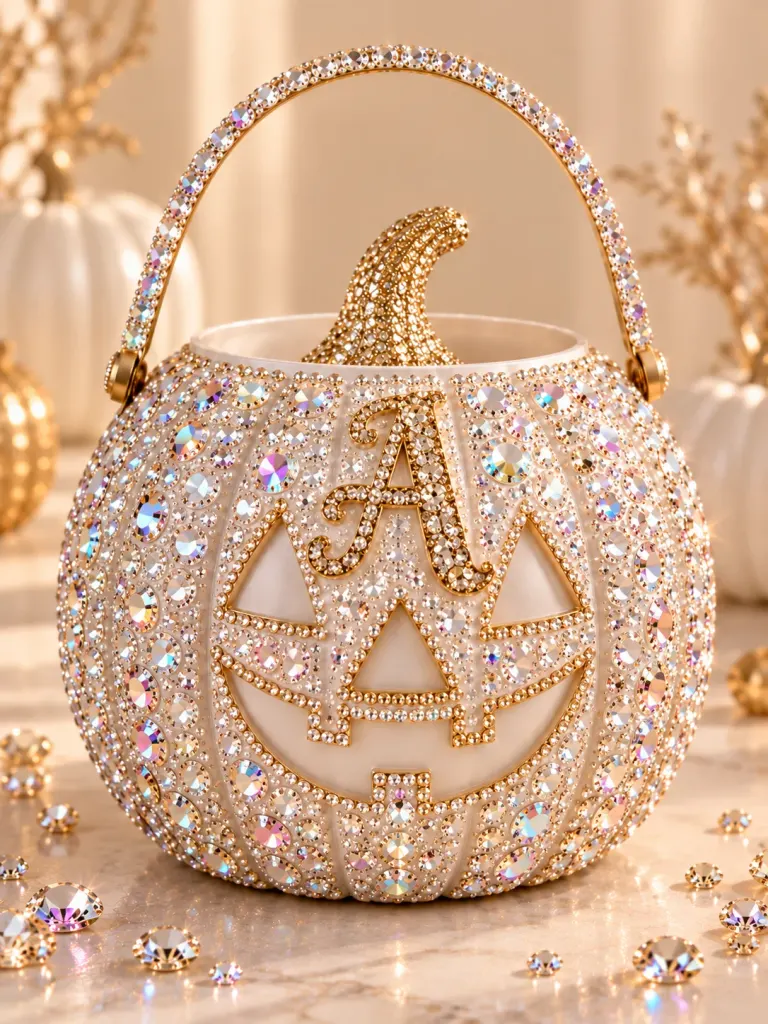
Personalization makes a bucket easier to identify at parties, school Halloween events, and group trick-or-treat outings.
An oversized initial is often easier to create neatly than a full name. Sketch the letter on paper, determine its position on the bucket, and outline it with small rhinestones. Use one color for the outline and another for the inside if the lettering needs more contrast.
For a full name, keep the letters simple and wide enough to fit the available surface. Narrow, elaborate lettering can become difficult to read once individual stones are attached.
A small star or bat beside the name is enough to finish the design. Additional motifs aren’t necessary when the lettering is already the focal point.
9. Western Glam With Turquoise and Silver
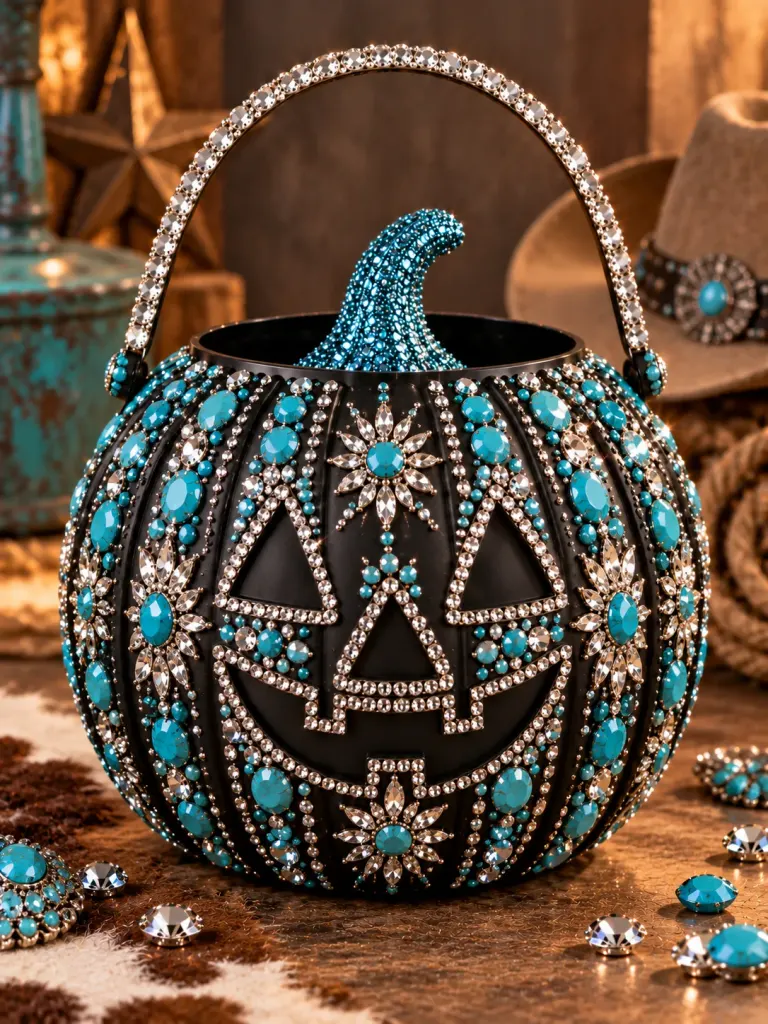
Turquoise, silver, and star shapes give a pumpkin bucket a western-inspired look. This palette feels distinct from the pink, rainbow, and black-crystal designs while still delivering plenty of sparkle.
Place turquoise rhinestones in small clusters across the front. Add silver stars between the clusters, or create one larger star in the center with smaller gems around it.
A removable bandana tied around the handle can reinforce the theme. Keep the knot away from the handle attachments and make sure the fabric doesn’t obstruct the grip.
If turquoise stones are difficult to find, use blue-green gems mixed with clear crystals. The overall color contrast matters more than matching a particular shade exactly.
10. Candy-Corn Crystal Stripes
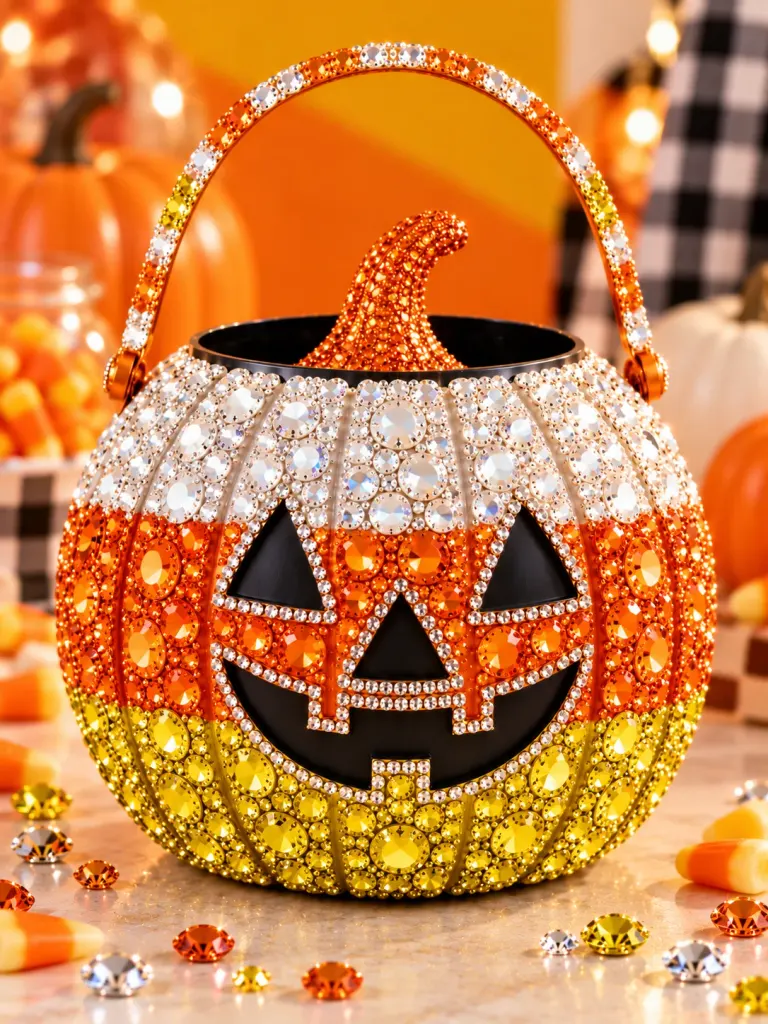
Candy-corn colors make a seasonal design that doesn’t depend on a complicated illustration. Arrange yellow, orange, and white rhinestones in stacked bands, or use the three colors to form a single candy-corn shape on the front.
For a single motif, place the yellow section at the top, orange in the middle, and white at the bottom. Outline the shape with small clear stones if you want it to stand out against the orange plastic.
This idea is especially useful if you want a recognizable Halloween detail without decorating the eyes and mouth. One well-defined motif can carry the design on its own.
What You’ll Need to Bedazzle a Pumpkin Bucket
The supply list depends on whether you want a quick project or a detailed, individually placed design.
| Supply | Best use |
|---|---|
| Adhesive rhinestone sheets | Quick coverage and simple rows |
| Individual flat-back rhinestones | Lettering, gradients, and detailed motifs |
| Plastic-compatible rhinestone adhesive | Attaching individual gems when adhesive-backed stones aren’t suitable |
| Tweezers or a gem pickup tool | Placing small stones accurately |
| Paper and pencil | Planning lettering, grids, and color transitions |
| Ribbon or a lightweight bow | Adding a focal point without covering the bucket in gems |
The bucket’s plastic matters when choosing an adhesive. Don’t assume a glue works with every type of plastic. Check the manufacturer’s current instructions and the bucket’s material before buying supplies. For example, the E6000 precision-tip adhesive instructions specify plastics on which that formula is not recommended, including polyethylene, polypropylene, and polystyrene.
Adhesive-backed gem sheets may be the simplest option, but test a small area first to check how well they hold. For individual stones, choose an adhesive designed for the specific surfaces involved and follow its application, ventilation, and curing instructions.
How to Decorate the Bucket So the Gems Stay Put
1. Clean the Outside
Wash the bucket with mild dish soap and water, then let it dry completely. Remove loose dirt and residue before adding decorations.
Don’t automatically sand the plastic or apply a solvent. Follow the surface-preparation instructions for the particular bucket and adhesive.
2. Plan the Layout
Position the main design before gluing anything. A paper template helps with letters and checkerboards, while a few temporarily arranged stones can help establish an ombré gradient.
Keep the rim, handle attachments, and natural gripping areas free of bulky decorations. These are the places most likely to experience rubbing or movement while the bucket is being carried.
3. Attach the Stones in Small Sections
Work a little at a time so the spacing stays consistent. Use tweezers or a pickup tool for small gems, and avoid excess adhesive that could spread beyond the stones.
With adhesive-backed sheets, smooth the material down according to the manufacturer’s directions. Curved plastic can make large sheets harder to position neatly, so smaller sections may be easier to manage.
4. Let the Adhesive Cure Fully
Drying and full curing aren’t always the same thing. Follow the product’s stated curing time rather than assuming the bucket is ready as soon as the stones feel dry.
Keep the project in the recommended conditions while it cures, including any required ventilation.
5. Inspect Before Halloween
Once the adhesive has cured, check that each decoration is secure. Remove or reattach loose stones before using the bucket, and inspect it again if it gets knocked around.
Small embellishments can present choking hazards to young children. Keep loose rhinestones out of reach, and take particular care with buckets intended for children under three. The U.S. Consumer Product Safety Commission’s small-parts guidance explains the risks associated with small parts.
Which Bedazzled Pumpkin Bucket Should You Make?
Let the design determine the materials, not the other way around. Choose pink rhinestones and a bow for a soft, playful look; a celestial or gothic motif for a darker style; or a checkerboard or candy-corn pattern if you prefer clean shapes.
For your first project, start by decorating only the front of the bucket. Choose one design, select two or three colors, and lay out the main motif before attaching anything. You’ll have a clearer idea of how many stones you need, and you’ll avoid buying supplies for a full-coverage project when a smaller detail would do the job.